Thursday, November 21, 2013

Birthday Give Away

I am wrapping up my brat week here with a give away!

I am giving away 3 copies of my Hippo Birdie Pattern AND 1 Pattern Digitization service of up to 5 pages.


You can enter through Raffle Copter


Even if you don't win, I am still running 30% off EVERYTHING in my etsy shop with the code BRATWEEK30 

Tuesday, November 19, 2013

Hippo Birdie to ME

I am celebrating my birthday this week!
Earlier in the month I was laying in bed thinking about my last birthday party a few years ago. My dear friend had brought Kinder Happy Hippo Cocoa Biscuits (cookies) and I teased her about not bringing anything bird related and then it could have been Hippo Birdie, which many of you will have ran across on the internet as a birthday greeting (corruption of Happy B-day?)

Inspiration struck and I got out of bed and pull out some visual dictionaries and animal drawing books. I found How to Draw Animals by Jack Hamm to be particularly helpful as it covered hippopotamus.

I drew a rough sketch of what my Hippo-Bird mashup should look like with seam lines and then went to bed, having formed the plan of releasing the pattern as a birthday celebration.

A few days later I did a quick internet search to see if Hippo-Birds were commonly illustrated, and satisfied that there wasn't already an obvious plush pattern on the market, I drew up the pattern pieces and made my mock up, using old sheets.

Mock up 1, which I still have, and will not show you the pictures of was a success for the most part, I did simplify a few things. Out of the 11 pattern pieces, only 1 was unchanged.

I then sewed up the second one out of grey cotton, noticed a few minor tweaks were needed (dart length, seam alignment) I then put my pattern into CAD and cleaned it up. I then scaled it down to be 2/3 of the original size and made up the second one in blue.


Monsieur requested a mustache, I couldn't deny him, it being Movember and all.After making up several felt mustache shapes (too fake, Snydly Whiplash, Kaiser), my husband decided on the final shape and I gave Monsieur his mustache and bow tie.


I then wanted to see how the pattern would translate to Polar Fleece, so I made up Prudence.
There are a few differences in construction between the cotton and fleece versions. The fleece, being a knit sculpts better, however being thicker means that the ears have to be single layer. I also used safety eyes on Prudence to check a different look.


Pattern is now available on Etsy. Also available on Craftsy


One of my favorite things about this pattern is the nostrils! They are created using a tuck dart as a starting point so they truly have depth to them.


All the while I was making these Hippo Birdies I was planing how I would stage the photos.

I used Abby Glassenberg of While She Naps' Tutorial on making Mini Felt Bunting, while at the fabric store I looked for cake or birthday fabric but all I found was some ribbon, which I bought since it went so well with the dots I was going to use for the cupcake wrapper. I made felt party hats, and then the girls got aprons. I also made up a cupcake complete with pink icing and a colorful wraper. Decided it needed a candle as well.


The cupcake is not included in the pattern, it will be part of a forth coming pattern for play food.

Know someone with a birthday coming up and have no clue what to give them? The Hippo Birdie just might be the thing.Pick it up on Craftsy or Etsy

Hippo Birdie to ME


Thursday, November 7, 2013

Pattern Digitization Service

I have decided to offer up my services at pattern digitization.

At this point I am only available to do craft and small accessory patterns  that are scanned in and in JPEG format. Patterns must be on regular size paper and with no pattern pieces overlapping.

The rest of my terms are found here

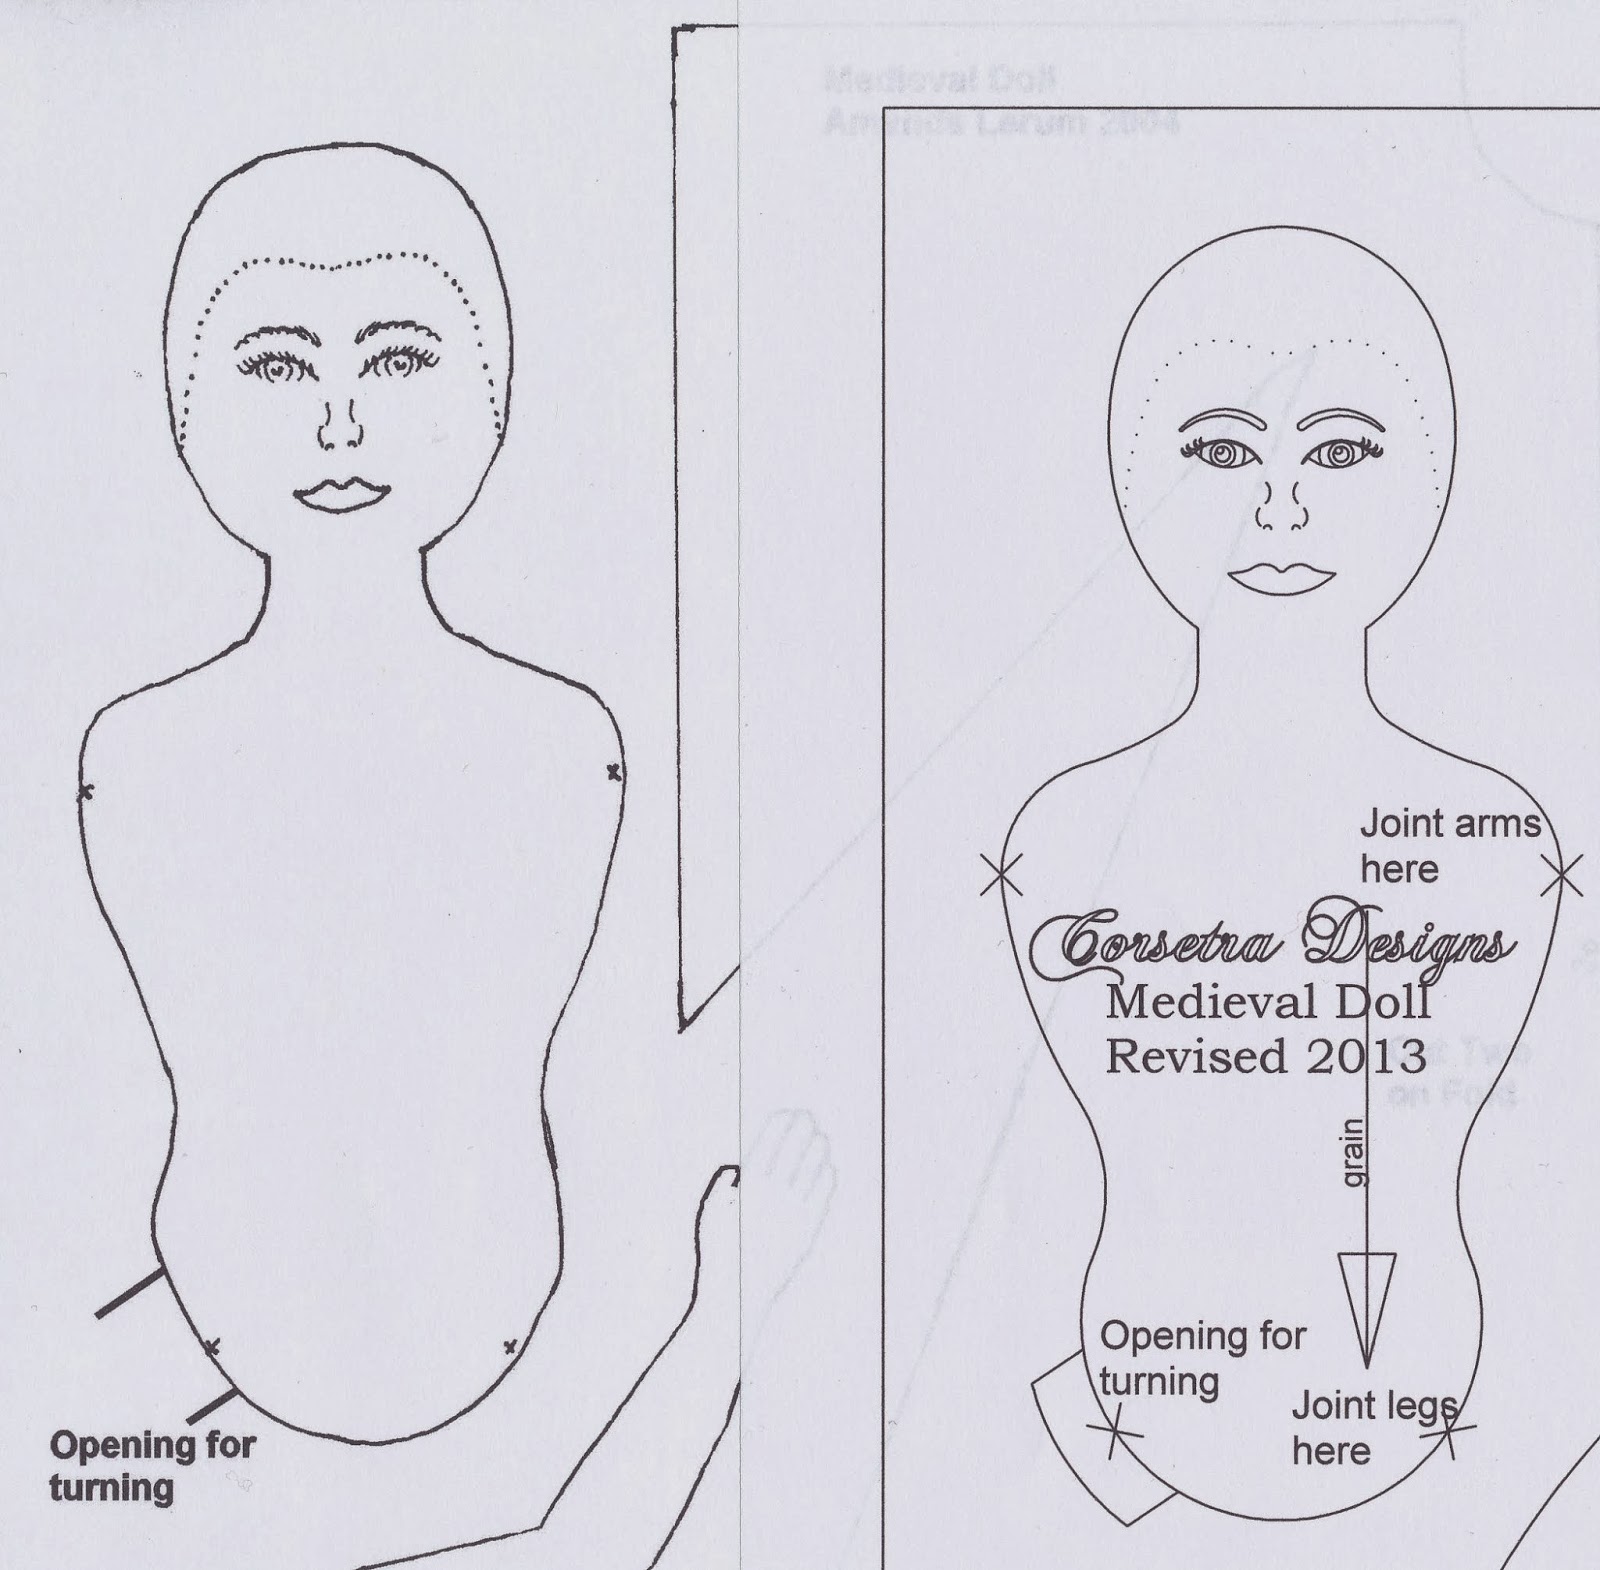
Here is an example of the differences you will see in a hand drawn to digitized pattern.


This is a pattern for a simple doll I made back in 2004. She was a gift and I never got photos for her.
On the Left is the early pattern I shared with words added in a photo editing program as my handwriting is lacking. On the Right is the recently Digitized pattern.

This is a scan of the two printout and there was no photo editing besides cropping!


It took me an hour to do the whole page, a lot was used up in the facial feature details and text.

I can do several line types, solid, dashed, dotted. different line widths, different line colors. I can use several fonts and letter can come in any height.

Adding seam allowance is a breeze in CAD

If your pattern is too large to fit on the page, I will reconnect the pattern in CAD, then break it back into pieces that fit on a page, this will insure that the piece lines up nicely.

More info can be found in this document, Please download and read thoroughly.

If you are interested I have created a listing on Etsy at an introductory price. Price is PER PAGE so order as many pages as your pattern is.


Since I never had good pictures of the doll, I am making her over, with additional wardrobe and hair styles!
Here is a sneak peek.


I hope to uploaded the doll pattern on Craftsy for free, I will includ both the hand drawn and Digitized patterns so that you can see the difference. You will be able to overlay the pages and looking at how they line up or vary. The biggest difference besides the facial details is that the body is now symmetrical! I originally shared this pattern on a yahoo group I was moderating (now defunct.)

I have a mailing list for those who are interested in this service, It will feature patterns that I have digitized and special offers as well as other useful information for the pattern designer.  You can SIGN UP HERE


Bonus image of the CADing process

Again my TERMS and SERVICES can be found here and the Etsy Listing is HERE

Tuesday, November 5, 2013

My Very Own Little Ponies

My children were Ponies for Halloween.
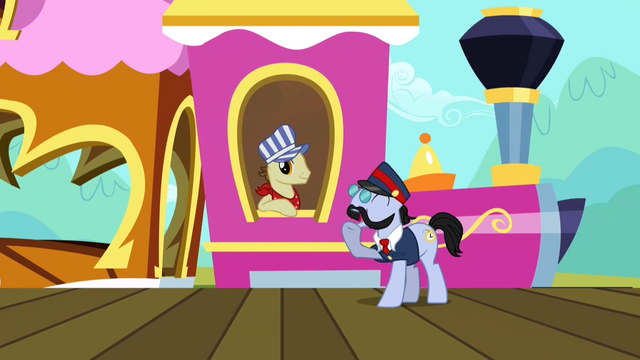
The boys settled on their characters of Doctor Whooves and Train Engineer a while back and I purchased the necessary fabric.
Daughter did not want to be rainbow dash but instead alternated between Kitty and Fluttershy. I told her that if she wanted to be a kity she could wear last years costume, but if she wanted me to make something new it would be Fluttershy.

So back to the fabric store I went to pick up her fabric.

I ended up altering the coat pattern I used last year, Simplicity 2745 and the hat pattern Simplicity 1953 became a hood.

For the boy's pattern I added on pocket, splitting the front into two sections as shown on my original drawing. I ended up liking how it looked when finished and they are pleased with the pockets. I also lengthened the coat by 2" from last year, so as to fully cover their little rears and give space for cutie marks. I made the boys coats the same size, 1 is skinny, the other a bit on the short side, they are wearing 1 size difference even though they are 2 years apart.

For my daughters I cut the next size larger from last year and left out the godets. There is still enough flare in the coat for it to look girly and work over skirts. I also added in pockets on the front princess lines.

For the ears I put the kitty ear hat on the table next to a pony figure and drew a new pattern. I placed a rubber band around the pony's head to mark where the hat would sit, in the last pic you can see the pins I used to denote where the ear would be sewn to.


Patterning the manes was my favorite part, I am very proud of how they turned out.
Train Engineer is mostly my own design, and fairly flat so as to fit under the hat.


Doctor Whooves is a three dimensional design to give that spiky look without using stuffing.  I have made spines for my dragons using a similar method. I loved the way these came out! Would work for doing a dragon or dinosaur as well. made putting the fez on a bit tricky though.


Fluttershy as fun seaming through use of darts to fit around the head, it is so sweet and stuffing free.


The cutie marks were done in a variety of ways.

Since the Train engineer is never seen outside of the train cab, we made our own cutie mark, taking the image of the train and letting my son pick the colors. I did change the order of the yellow and black on the wheels for visibility sake, and explained to him why. The Train was drawn on to plain cotton with fabric markers, stitched to a second piece of cotton and turned right side out, the machine appliqued on to the coat.

The hour glass was fleece machine appliqued on to the coat.

The butterflies were fleece hand appliqued on, the antennas and bodies were couched yarn.

I did not finish the pants, and was up till 1 am the morning of finishing the boy's coats. I made a small train hat from Aesthetic Nest (printed 2 to a page to reduce scale) and a small fez. I was punch at this point so I give you the following pictures.


Fluttershy's wings are made in two layers with laters of batting between the fleece to give the wings some structure. I decided to sew them on to the coat. This means she can't wear the coat in the car, but she shouldn't anyways for safety.

Now for some pictures ON the children

 And some pictures on the dress form (which is about 2 sizes too small and doesn't have a head.) Since children are so wiggly, and I am not keen on posting pictures of my children


Last, but definitely NOT least, here are the pattern pieces for Ears, Manes, Tails, Wings and the mini Fez. You will need the original Simplicity hat pattern 1953 for the hood, though you may be able to adapt this to another pattern.
The PDF is one 2.4mb file and includes all 8 patterns (Ears, 3 Manes, 2 tails, Wings and Fez) Feel free to share this link, but do not share the file. It took me quite a bit of time to format it all nicely.

Tuesday, October 22, 2013

Pattern Testers make the world go'round

Lots of people make patterns, just take a look at Etsy to see how many indie pattern designers there are.
What sets apart a Good pattern from a GREAT pattern is how finished the pattern is, not just the design or the photos of the finished project, but the way it is written and illustrated. How well do the pattern pieces fit together, did it run true to size, any confusing steps?
Those are the things that a pattern designer will learn when they send their patterns out to testers.

What is a tester supposed to do?
READ the pattern, typos are always an issue, and sometimes a construction step will get lost in the writing process.

Rose Clearfield has this to say about proofreading:
Proofread and spell check. Again, it saddens me that I have include this, but I have seen published patterns with red underlined misspelled words on the covers. Check and re-check your pattern and then have at least one other person proof it for you. If no one at home is interested in doing this, see if you can send it online to a fellow crafter.
Varied readers. When I was writing my first pattern, I found it really helpful to have both people who do and do not make that particular craft (in this case, beadweaving) read over my pattern. Especially if you are creating a pattern that is suited for beginners, it's really important to ensure that the terminology that you use is appropriate and will not be confusing.
SEW up the pattern, especially if it is a garment patterns, as it needs to be tested on a variety of body shapes.

So what I am looking for? at this point ANYONE with ANY interest including but not limited to:
  • Modern Clothing for Women and Children
  • Historical Clothing for Women and Children
  • Corsets
  • Soft Toys and Dolls
  • Art Dolls
  • Accessories and other Crafts
Interested?
 
SIGN UP HERE

When I have a pattern ready for testing I will send out an e-mail with information on the pattern and a form to be filled out to apply to test the pattern. Then I will e-mail back those I selected to test it out.


Links of interest on this subject
Colette on how their patterns are made

Abby Glassenberg on How to recruit, manage and get the most out of pattern testers

Patchwork Posse wrote a lovely post on  requirements for pattern testers

Charming Doodle invited a few other PDF clothing pattern designers to talk about pattern testing and what makes a good pattern tester.

Elegence & Elephants wrote a lovely scale for the levels of their pattern testers experience when they called for pattern testers


*I have a small list of people already who are my readers only, so I really am looking for people to MAKE these items up.

Thursday, September 26, 2013

More Market Research and Holiday Planning.


I recently joined and online group for stuffed animal/plush/softies designers looking to improve/sell their patterns. It is still new, but so far the conversations have been good, kind, and helpful.

So I was spurned on to purchase a few patterns from popular designers, and am planning to make them up as holiday gifts. (with $ i made selling on etsy, no less!)

I then went on another free pattern download spree and have been looking at lots of patterns this past week.

Craftsy is a goo place to look for free patterns. they carry quilt, clothing, craft and toy patterns, as well as knitted and crochet and other goodies.
Modern patterns are not as confusing, most of the time.

In looking at all these patterns I learned a few things about myself as a PATTEN USER.

1. I like pretty first pages (covers) that DON"T smack of having been made in MS Word.
2. I don't care for step by step color photos.
3. I don't care for first page (cover) that is in landscape format, especially if it is the PDF in a portrait layout....

The reason WHY I like/don't like these things is that I PRINT OUT MY PATTERNS and then store them in sleeves in a binder.
1. is just an attractiveness/ professional-feel thing, and I know that I shouldn't judge a book by it's cover, but it is the first thing I see when opening the PDF, and my binder.
My first patterns were made in MS Word, and I am now playing around with other software to try and insert more personality/attractiveness.)
2. INK, it comes down to ink, which as we all know is money. I often don't print the pages, but instead read them on my computer. Now my computer is on the opposite side of the room from my sewing machine and if one is on, the other is off. Now I know many will disagree with me, but I see that I will NOT being doing photos for EVERY step, but just those that need it. I like B&W illustrations, and can do them for most things. Maybe I should look into doing both format for my customers? OPINIONS?
3. I know WHY patterns are done in this format, it is a common format for printed patterns to be sold in. and if I ever do manage to get my patterns in local stores I may just follow suit, but you won't find my PDF's done in that format.

I downloaded a lot of free patterns, discarding immediately those that were just a pattern page and few words on how to, or worse, a link to a tutorial. That isn't too helpful when you are just studying patterns, not actually interested in making the project.

Yes I did download several patterns that I will never make up, patterns for dolls, animals, quilts, clothes, even though I may not ever produce a quilt pattern, I can learn about what I would want my pattern to look like my looking at them.

Have you spent time looking at PDFs? what do you like/dislike about the ones you have seen?

I would recommend heading over to Craftsy and taking a look, keep the upcoming holiday season in mind, try something new.

Off to the sewing machine now, the fake fur is calling to me.

Market research is never ending, so don't expect me to stop posting about it anytime soon. :)

Thursday, September 19, 2013

My Little Brony: Costume Planing

After talking with my children, the boys have decided that they want to be Ponies. My eldest was insistent that if his brother was going to be a Pony that he be a boy pony, so suggested Doctor Whooves which he liked. Then eldest decided he want to be the train driver pony
http://mlp.wikia.com/wiki/File:Conductor_pony_and_train_driver_S2E14.png
The Train Driver IN the train, not the Conductor outside the train.
We need to come up with a cutie mark for this pony, we think the engine will work well.

So I have already purchased fabric, left to right: Cotton knit, that I should try to dye for their shirts, Polar fleece for their hoodies, and twill for their pants. I believe I have brown fleece in the stash for the mane and tails. I also got an assortment of buttons for the pants and hoodies, I may need more but this was all my store had, will have to check other stores in area.


The sketched designs have already passed child approval.

PANTS and SHIRT
Shirt is knit and I hope will feature a design that coresponds to the whole costume but can be worn on it's own. Thinking of the Train engine for one and a cute Doctor quote for the other.
Pants, I don't need to buy zippers as I have been saving them from pants that my children and husband grow out of. I reuse a lot of old clothes, though they rarely become more than mock up material.
Eldest is a skinny boy who has trouble keeping his pants up, the ONLY pants he can wear sucessfully are the ones with the buttonhole elastic in them to adjust the size, and overalls. I intend to use this in the pants, so that IF they survive to be grown out of, the next child can wear them. My children rarely use back pockets, so those have been omitted, but they do have to have pockets. I will be doing a double layer at the knee of the pants, as that is where they wear out the most.
On the sides there will be the Cutie Marks, yet another reason why the back pockets have been omitted. I am not sure if these will be temporary or permanent, so I think I will hand sew them on. They will NOT be made of felt, but cotton.

HOODIES

The hoodies, and I am going with attached hoods this year, will have the Ears and Mane permanently attached, they will button up in front and I will be altering the pattern from last year, adding in pockets in the front. The Hat, Scarf and Tail will be temporary basted on. The Tail may stay on, or it may come off, depends on how the children deal with them.

The Docto's Fez and Bowtie will be basted or pined on, and since I knew what cutie mark he has, I have shown in on the side. Cutie Mark will be a permanent fixture of the hoodie.
I will be making a felt sonic screwdriver too, probably more than one so each my children can have one, but there are enough variations for that!


So that is my plan, I have most of the Materials, next up is Pattern Alteration!

Friday, September 13, 2013

Pockets for the Bed

Organization.
It's important. A place for everything and everything in it's place. Especially when your space is small.
I mentioned in the post about my Bed Curtains that the current living arrangement for my family is living with relatives and all sleeping in the same room. It is tight and there is NO space for books or toys in the bedroom. (though my husband keeps creating a PILE of books beside the bed.

School just started and we were practicing several weeks ahead of the actual start to get ourselves back in routine. Kids are slow in the morning, so one of the common pieces of advice about getting them ready in the morning is to have they get their clothes set out the night before. There is no place for them to do that in our room. Yes there is a dresser, and they could put their clothes on top of that, but it normally is buried under the stack of books from my husband and the lonely sock bin. I just removed those from these pictures.

Instead I thought that I could make a set of pockets to hang over their headboards (yes the actually headboards are arranged at their feet, it was how things worked in our room, I will explain things later.)

I went through my stash of novelty cotton prints and while I had all the fabric for the pink one, I still needed to get solid blue and green for the boys.

First up is the Eldest's bed. His bed frame is home made (re-purposed posts no less.) and is currently attached to the shelf frame over his bed on the far end. In a room with so little floor space, all storage (extra blankets, towels and out of season clothes) must go UP. His bed is too low to the ground for any under bed storage.

He likes Blue, Red, Vehicles, especially trains, buildings and Dogs, so I had been collecting prints from the Traveling with my Pets line by M'Liss for a while. this was an opportunity to use them.


Next child has an Extensible bed from Ikea and has an under the bed drawer/bin for some clothes. Bears and Tractors are just right for him. Pockets are of differing lengths inside and outside the bed to accommodate mattress height.


Last child also has an extensible bed from Ikea with a draw bin under it. This one required an actual pattern to be made because of the curve. The other two were done by just using measurements.


I LOVE these extensible beds from Ikea, they are twin width but you can set them shorter, they are currently set to their shortest to allow us to have some room to walk between the beds. The reason that the headboards are near their feet is so that they can have drawers under their beds without the third leg, which supports the bed in the middle, being in the way.

The tall dresser between the boys' bed is half Husband's and half Eldest. The dresser between the youngers beds is mine, the other large dresser is the kids' Most of Hubby and mine's clothes are hanging on the wall next to our bed behind the curtains. I also hang some on the wall between Daughter and our's bed, which I removed for photos.

As you can see from the floor plan above, which I made when we were trying to find a better layout for our room many months ago (I LOVE CAD!), there is just about 2 feet of walking space between all beds, the best we could do since we determined our children would not be safe in a bunk bed just yet. There is a laundry basket, for clean clothes, that lives between our and Daughter's bed, and a laundry hamper, for dirty clothes, that lives at the end of Eldest's bed, another laundry hamper is in the bathroom of course, and then there is always a pile of socks under my husband's computer table.....

Now the children haven't quite gotten into a routine of putting the next day's clothes in their pockets, but at least they have the option, and I USED SOME STASH! with 2 children at school, I foresee a lot more sewing in my future.