Showing posts with label toys. Show all posts

Thursday, December 26, 2013

Making Twilight into an Alicorn

For Christmas I got my children the 7” My Little Pony plush made by Ty. 

I knew they would want Twilight Sparkle to be an Alicorn (winged unicorn), so I made “Princess” wings for Twilight Sparkle out of polar fleece.

 I spent that last few days sewing these wings up, in plain sight of my children, telling them they were dragon wings (they almost believed me) and then attached them on Christmas Afternoon.

In case you too want to turn your Pony into a Pegasus, here is the pattern for the wings.
The pattern is for PERSONAL USE ONLY

Tuesday, December 24, 2013

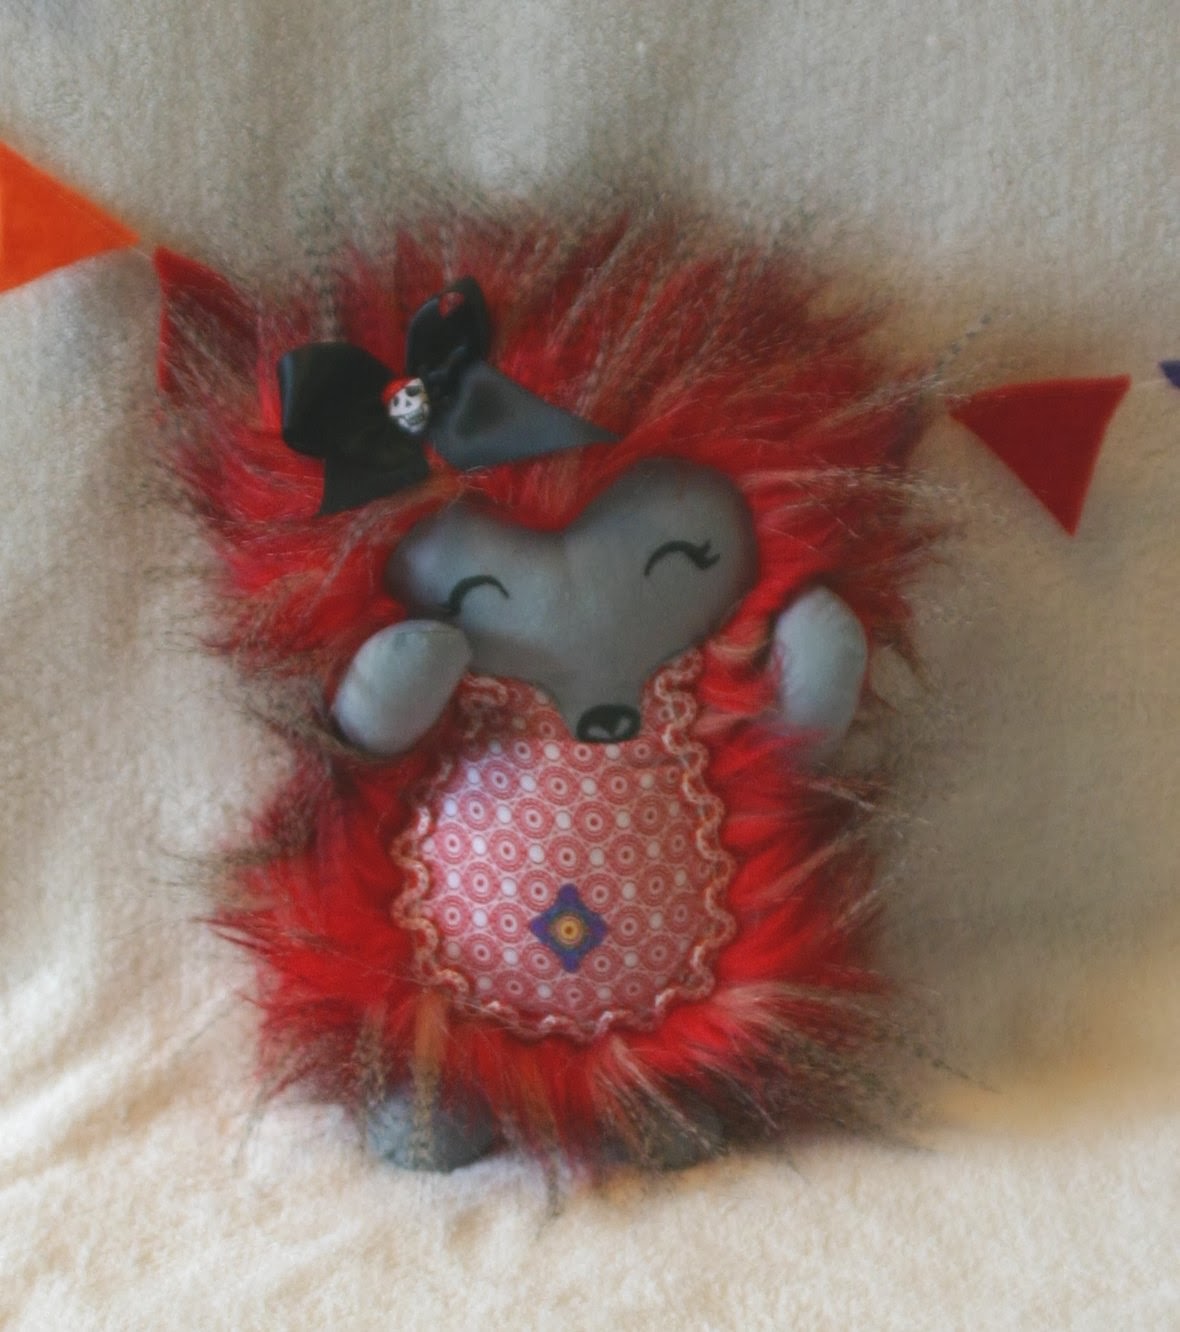
Spunky Hedgie

As part of my market reserach, I purchased Dolls & Daydreams' Hedgehog pattern to make up for a friend of mine.

While I had brown curly fabric like that shown on the pattern cover, I decided to see what my fabric store had. I ended up getting this fake furn in my friend's colors: Red, Black, & White.

I cut my pattern out with the fur direction going UP, in the hopes that this would give a more spiky look when finished.

Now this fur is long, especially for the size of the pattern, I didn't want extra fur in some places, so I cut off the fur 1/2" inside where the tummy and face would be. To do this I printed out a second pattern piece, cut out the sections that would be covered, drew around that on the back of the fur, then stitched using long stitches on the fur side, short on the back, and carefully found my stitches in the fur and cut off a boarder inside that stitch line.

I don't like using iron on bonding products, preferring to sew, so for the tummy and head, I traced the shapes onto my fabric, stitched on the lines, cut out, made a slash on the back THROUGH ONE LAYER ONLY. Then turned RSO, pressed and stitched down.

I added trim around the belly and decorated her belly with some fabric markers. Her face is also done with fabric markers. The scull on the bow is not a charm or button but a motif from a quilting cotton, It was small and fiddly but I knew it was just the right touch.

This was a gift for my dear friend, But she was sitting around my place for several months. I will however miss seeing this happy face around my house, but I can always make up another, I still have plenty of the fur (and no other idea what to do with it!)

Dolls and Daydreams pattern was clear and simple to follow, being a "flat" doll shape. There were clear step by step instructions. I did change things up a bit, besides the fabric choices (she recommends having the fur going DOWN, which is what you normally do with fake fur, but isn't very hedgehog-like.) I do however prefer to use the template method for small pattern pieces like the arms and legs, which is what I did.

Tuesday, November 19, 2013

Hippo Birdie to ME

I am celebrating my birthday this week!
Earlier in the month I was laying in bed thinking about my last birthday party a few years ago. My dear friend had brought Kinder Happy Hippo Cocoa Biscuits (cookies) and I teased her about not bringing anything bird related and then it could have been Hippo Birdie, which many of you will have ran across on the internet as a birthday greeting (corruption of Happy B-day?)

Inspiration struck and I got out of bed and pull out some visual dictionaries and animal drawing books. I found How to Draw Animals by Jack Hamm to be particularly helpful as it covered hippopotamus.

I drew a rough sketch of what my Hippo-Bird mashup should look like with seam lines and then went to bed, having formed the plan of releasing the pattern as a birthday celebration.

A few days later I did a quick internet search to see if Hippo-Birds were commonly illustrated, and satisfied that there wasn't already an obvious plush pattern on the market, I drew up the pattern pieces and made my mock up, using old sheets.

Mock up 1, which I still have, and will not show you the pictures of was a success for the most part, I did simplify a few things. Out of the 11 pattern pieces, only 1 was unchanged.

I then sewed up the second one out of grey cotton, noticed a few minor tweaks were needed (dart length, seam alignment) I then put my pattern into CAD and cleaned it up. I then scaled it down to be 2/3 of the original size and made up the second one in blue.


Monsieur requested a mustache, I couldn't deny him, it being Movember and all.After making up several felt mustache shapes (too fake, Snydly Whiplash, Kaiser), my husband decided on the final shape and I gave Monsieur his mustache and bow tie.


I then wanted to see how the pattern would translate to Polar Fleece, so I made up Prudence.
There are a few differences in construction between the cotton and fleece versions. The fleece, being a knit sculpts better, however being thicker means that the ears have to be single layer. I also used safety eyes on Prudence to check a different look.


Pattern is now available on Etsy. Also available on Craftsy


One of my favorite things about this pattern is the nostrils! They are created using a tuck dart as a starting point so they truly have depth to them.


All the while I was making these Hippo Birdies I was planing how I would stage the photos.

I used Abby Glassenberg of While She Naps' Tutorial on making Mini Felt Bunting, while at the fabric store I looked for cake or birthday fabric but all I found was some ribbon, which I bought since it went so well with the dots I was going to use for the cupcake wrapper. I made felt party hats, and then the girls got aprons. I also made up a cupcake complete with pink icing and a colorful wraper. Decided it needed a candle as well.


The cupcake is not included in the pattern, it will be part of a forth coming pattern for play food.

Know someone with a birthday coming up and have no clue what to give them? The Hippo Birdie just might be the thing.Pick it up on Craftsy or Etsy

Hippo Birdie to ME


Wednesday, April 24, 2013

Getting aHEAD

After making the Pink Zebra and changing the pattern, I cut into my intended fabric, knowing I had enough to make a second pony if the pattern was still not to my liking, this time I used the proper grain as I was working with a solid, not a print.

I also choose to make this pony standing I actually have about 4 poses made into patterns.

If I thought the last pony had a funny head, this one has a stupid head!

The body, how ever, is good, though I think the legs need to be longer to match Applejack better, as is they work more for her little sister Apple Bloom

So I am taking the stuffing out, unstitching the head and making a new one, raising the ears and giving more chin. At least my child is happy with it as is, but I just couldn't stand looking at this face for long.

Tuesday, April 23, 2013

Testing YOUR OWN Patterns and offering Free patterns.

I mentioned in my last post that I was working on making a plush Pony for my child as a Birthday gift.
Since the pattern was not as I hoped I have had to revise it. and this lead me to thinking about how You as Pattern Maker should test your own patterns before sending them out to pattern testers.

Why should YOU test your OWN pattern?
1. To test a different order of operations,  maybe it works better done in a different order
I put the Pink Zebra together in a order that was complicated, so I need to try a different order to streamline the process, especially if I ever release it as a pattern (which I don't know if I will.)

2. To double check your pattern pieces. If you made the pattern pieces by hand and then scanned them into the computer and cleaned them up, you need to know if they print out appropriately. If you put them in a different format, like a PDF, you need to print from that format just like your customers would.

3. To check your instructions. Assuming that you have written the instructions at this point, if not, you should make it up following your instructions precisely once they are written. If you have ever written a report, you know that the common advice is to print it out and read it from the paper, or better yet, have someone else read it. Sometimes it is easier to miss your mistakes on the computer.

4. To check all variations and sizes. I have heard of clothing patterns that didn't work out in the plus sizes due to grading errors, not only is this annoying, it can be damaging to your companies reputation.

What if the first iteration of the pattern doesn't work?
You obviously need to change it, make notes on the pattern pieces of what needs to change and where the changes need to be.

Should you toss the nonworking pattern or save it?
This is a personal opinion, but I say save it, at least until you have the FINAL finished pattern. DO make sure to label your patterns with a version name or number so that they do not get confused and printed by accident (it happens, even to the bigger companies.) For a paper pattern, use a colored ink, for computer files, change the name just a bit. Version 1, V1, and 1.0 are all good names.
When you have the final pattern you may choose to toss or delete, but my persona preference is to put the previous iterations in a smaller envelope inside the main envelope, that way I have them for future in case I need to go back to them.
Yes my handwriting is that bad, which is why I love using the computer!

Is all this necessary if you are only giving the pattern away for free on your website or blog?
Depends on your end goal, and general view. While there is the common thought that "you get what you pay for" with free patterns, IF you are also SELLING patterns, your freebie is what will draw in or send away potential customers. If your free pattern doesn't work well, why would anyone choose to pay for a pattern? They are expecting that all your patterns are done in the same format, and if they had a bad experience with your free pattern, they are not likely to want to "waste" their money on buying a pattern.
IF you are just a blogger sharing, how well finished your pattern is, depends on the level you want to put into it, and what you expect of your target audience's skill level.

One more word on Free Patterns, IF you didn't test it even though you are 100% sure it will work, put a disclaimer on it. If you didn't test all the variations and sizes, put a disclaimer on it. "This pattern has not been tested at this point" is fairly clear, on the other hand "This pattern has been tested by me (and others if applicable) and works" is a lovely way to give your viewers confidence about your free pattern.

Friday, April 19, 2013

Pink Zebra Mishaps

As a crafty parent, when your child asks you to make them some thing for their birthday and you don't already have anything to give them, well you try your best to make that thing for them.

My child has asked for a stuffed Applejack

I had already used another pattern to make a pony for one of my other children, and was not 100% happy with how that one had turned out, so I had made my own pattern.

I made the pattern, and then moved on to another project without ever testing it!

Time to pull it out and test it!
I had planed to make Applejack out out of polar fleece, so I pulled out some Pink Zebra fleece from my stash to make a test pony.

I then spent a long time embroidering the eyes, they ended up working well, but not equal and placement was not equal either. While embroidering the eyes before making the head is easier since the pieces are flat, it doesn't always make a for a good expression. Embroidering also took a long time, so I think I will experiment with applique AFTER assembly next time around.

I also tried to embroider the flank.
The design comes from a painting my husband did which is based on the Golden Rectangle.

I drew my design on plain white cotton, pined it to the wrong side and running stitched around the design so that I could see where I needed to fill in on the front side.

I added the second color as work progressed
When I got almost finished I realized that NOT working in a hoop and left the flank all wrinkled, so I put it away and cut a new piece.


Then I sewed up the pattern and stuffed it, Here is what I ended up with.

I have two major issues, the head is well flat faced, like the poor dear ran into a wall, also the front legs are too splayed out, the under belly being to wide. I was concerned that might be the case.

But other aspects of the pattern worked perfectly, and yes I forgot to cut hoof pads, so the stuffing is peaking out there, but this is not a finished animal, and I may indeed take the stuffing out and toss it.


I have about a week left before birthday, so I best get to fixing these issues and make another test of the pony pattern if I hope to have something for my child on his birthday!

Sunday, April 14, 2013

Time and Usefullness

I have been working on a few projects this past couple of weeks, like many creative individuals I always have more than one iron in the fire.

One of my projects I have been keeping accurate notes on the times I have spent on it, yes I am recording the minutes I have worked on it. I have never done this before and I have found it interesting how long some tasks take and how quickly others are done.
At this time I can't tell you any more about this project.

Another project I am working on is the Pink Zebra. This is my easy pick up and put down project, great for snatching little bits of sewing here and there, waiting for the bus (but not on it, that makes me sick) waiting for the concert to start, whenever.

I carry it around in this jewelry  case.
which has a multitude of pockets, some of them removable.
At this point I have one eye finished, and the other is well on it's way, then there are two more flowers to embroider and I can assemble it all together.


Slowly I am getting better at embroidering eyes!

Thursday, April 11, 2013

I am not just doing it for you,

I am not making this just because you asked,
I am not helping you with this project just because you are my friend,
Nor will I help you in the hope that you will help me, or other karma,
I do not drop what ever I am doing, to help you look for that reference for your research just because you need it,
I do not enter challenges just for the prize,
I will not write about that topic just because you want to read it,
I am not doing this just because you asked.

I do it because I want to.
I do it for the Challenge.
I do it because I see it helping me in some small way.
I do it for the benefits that may come later.
I do it because it inspires me.

This post brought to you by my children's birthday gifts I am working on.

Embroidering eyes

Fabric is a pink zebra polar fleece, I drew the eyes on white cotton, colored them in with fabric markers (didn't have purple, so I used red) and then started stitching it down, cutting around 1/8" and turning under as I worked.

Wednesday, December 26, 2012

Giftmas 2012 Part 2

This post has ZERO sewing in it.It is something that I "made" for my children as their Big gift.

A WASHER AND DRYER!

One of my sons asked for a washer months ago, so I looked at options online and decided to Mod my own.

I started with Closetmaid Qubemates with Door

Source: amazon.com via Corsetra on Pinterest

Another option would have been this 2 Door Cube at Target

After assembling the cube, I turned to my Brother-in-law who was in the shop working on his own project to help me with the back board. I had purchased the 2 black knobs at my local Ace Hardware, the round wooden ones were found in the shop from an older project, likely several years ago.
The writing was done with sharpie, after looking at the real deal in the laundry room.


Should these units be out grown by my children, they will just be used as storage after the back board is removed.
Baskets from the dollar store add a nice touch to the set.
Christmas morning the children were very happy to find it and decided to wash their Christmas stockings (after they were emptied of course.)

Unfortunately the black knobs worked themselves of their bolts, so my husband and his dad found better knobs that won't come off!

If you wanted to do this for your children, please read the size of the cubes first to make sure you have room for them, the units are supposed to have shelves in them and thus have no door stopper other than the shelf. to remedy this I used the plastic hardware that was supposed to be used to anchor it to the wall as a stopper for the door.
I was originally hoping that I could do a top loading washer, but the units are no perfect cubes. the depth is different from the height and width by about 2", so front loading washer it is, even though that is not what we have for the real deal.

The washer and dryer are set in a little nook area by the front door that is the play kitchen.
The unit on the left is ClosetMaid 1 Door Organizer that we use as a Fridge, which the children got about 2 months earlier since they figured out I was wanting to get them one. I got baskets inside to hold the food, otherwise it rolls and falls out.

the Kitchen by Alex Toys was part of last years Big gift and I love it's small size which is great for apartment living. the back bar with the hooks comes out and can be put inside the oven for storage. Actually that bar is not necessary and can be discarded if the children are unsafe with it. I like how it is NOT PINK as cooking is not something that is divided by gender, nor is laundry for that matter!


Tuesday, December 4, 2012

Computers, sewing, and the Holidays

I spent the last week without MY computer. I used my husbands Linix machine for basic internet, but since RhinoCAD doesn't work in Linix, I had to draft my patterns by hand, which meant I made some mistakes.
My computer is now up and running better, I didn't loose any data, and I even have MY color printer now on my desktop! But I am sure my computer is up for a clean sweep and reinstall of Windows soon.

So I spent my time sewing instead. I mentioned making a pattern above, yes I am making gifts for the various winter holidays that those around me celebrate. I can't talk about many of them, in case a recipient reads about their gift ahead of time, but I can share that I have been making a doll bassinet/basket for my daughter. She has a Baby Stella by Manhattan toy and I wanted a SOFT bed for Stella, but couldn't afford the one Manhattan toy sells, as nice as it is. I wanted a soft bed for a couple of reasons, 1. I am afraid my children would break a nice wood or wicker one, 2. Stella's bed will likely end up IN my daughters bed, 3. washabilitiy, 4. I MAKE something for her.

So I made a pattern, and didn't measure it correctly, so there is an added "design element" to it that an the whole actually makes it look more visually interesting. I will share pics after it is finished.

Do you know how hard it is to make something for someone when they are present? I know she is a small child and thus can be distracted with toys or the TV. I know some families are not so big on surprises, but to me that is part of the gift, the unveiling. At this point it is begining to look like something, so I have to work on it while she is not in the room, likely when she is sleeping.

Now to figure out what to make my Boys so that they get something from Mom too!

Wednesday, October 10, 2012

Halloween 2012 Part 3

 This is the Third and last post on Halloween Outfits for My children. See the first post here

And the second post here

This was mainly done just for fun. As it is not a wearable.
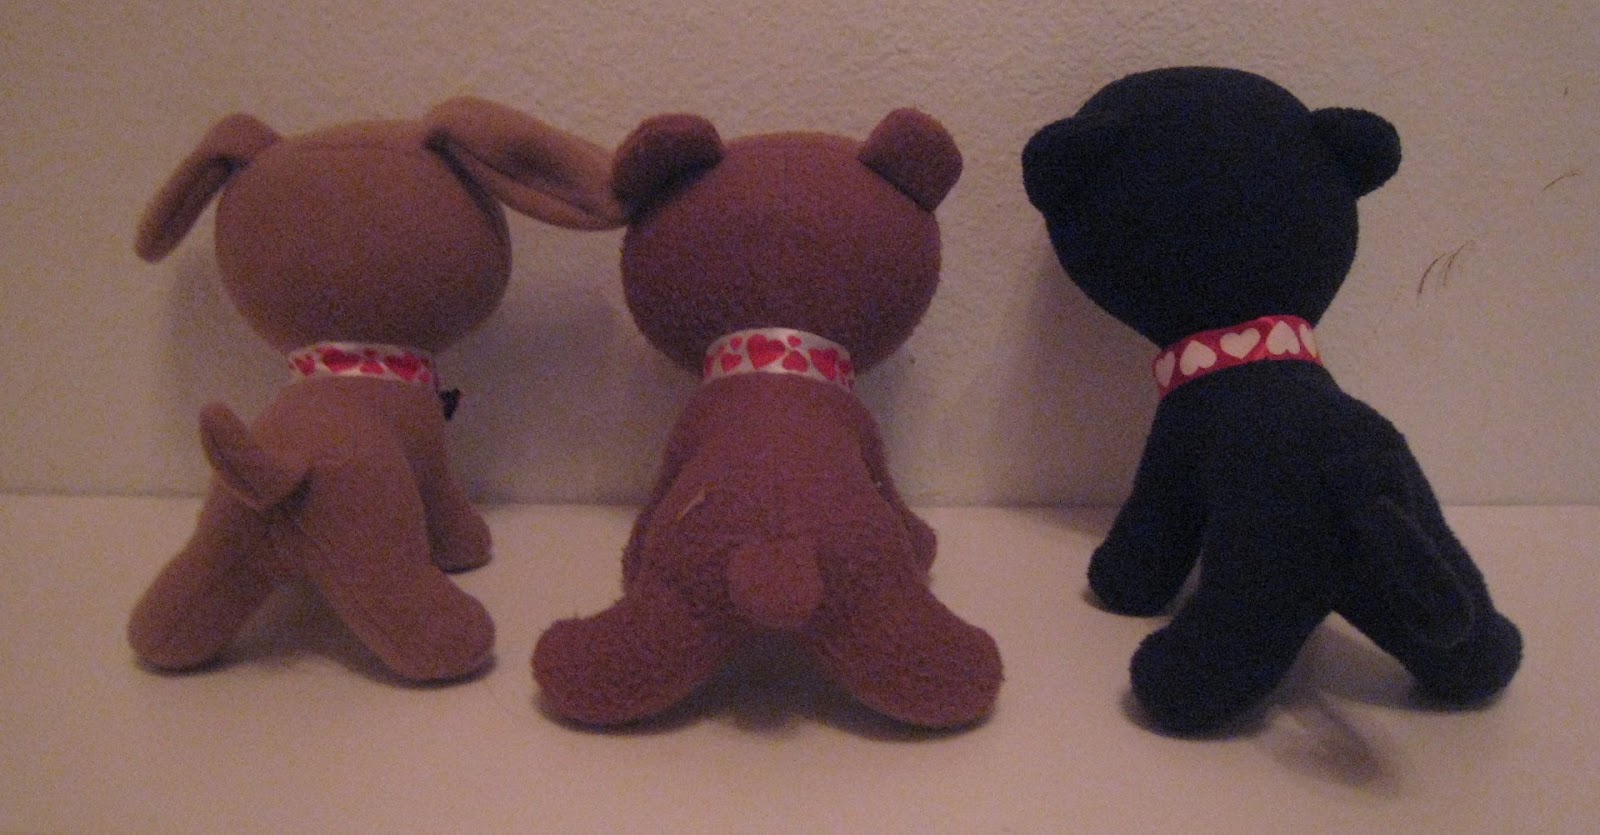
I made each of my children a stuffed toy in their animal with the same fleece as their outfits using Simplicity 2387

This is a pattern for a Cat and Puppy, so I needed to make a bear. To make a bear, I just altered the cat ears to be round and the tail to be round as well. I think the Cat ear pattern should be more pointed.  The paws are difficult little pieces due to their size and I don’t think they added much to the foot shape, swinging the front of the leg out, might have done the same thing.


If you choose to make this pattern here are some things I did differently that I think made it easier.
1. Embroider the face before you attach the head front to the head back.
2. Hand sew the paw bottoms on by hand
3. Turn the body right side out and insert it into the head, which is inside out, and then sew the neck.

Each animal got a ribbon around it’s neck and a special button. The Dog has a Red Train, the Bear an Airplane with many colors, the Cat a Green Frog. Each child picked out their buttons.


My Children all love their animals and often carry them around and tuck them in at night. More than any of their other animals since these are specially made by Mama.
Unfortunately the Airplane button on the Bear's ribbon lost it's propeller when the child owning it was banging it against a table. Thus a tantrum followed and once he calmed down a trip to the fabric store to get a new button happened. He now has a green car.

Friday, September 7, 2012

Thinking in 3D

I have been in a creative craft pattern making mood the pat few days.
As I sat down with paper and pencil a few days ago and started drawing out a new stuffed toy pattern, I was reminded that I don't always put much thought into WHY I put the seams WHERE I do. At this point it comes pretty easily to me, but someone just starting out, they might be baffled.

This morning, I saw my Kindergartener sitting at his table with paper, pencils, scissors and glue sticks. He was trying to make something, so I steped back from working on my pattern on the computer and took a closer look at what he was working on.

This is what I saw
He told me they were party hats for his My Little Ponys, and had already assembled one of them.
If you look closely you will see he has drawn the little fold over glue tabs that are needed to make a paper model. His father makes paper models and had showed him he needed the glue tabs earlier this summer. Since then he has been trying to make 3D shapes out of paper using what he has picked up from watching us make our crafts. He also really is interested in using CAD on the computer since both his parents use it.

I then showed him how he could make the same shaped hat by using a section of a circle instead of triangles. He then corrected my hat to have the scalloped hem!

So I have been thinking that a short blog series on how simple shapes can be used to create complex shapes and how to think more in 3D when you want to create a stuffed toy pattern. I just don't know what to call it. Softy, Plushy, Cloth Sculpture? each is a different term, but where does my work fit under those categories? They are not always toys, and the fabrics can vary, though woven cotton is my standby.


So anyways look for a blog series coming soon!

What become of the Pony Hat? Well My Husband helped him cut out one and glue it together, then I added the thread, so the 5 sided pony hat seen at the right most of the picture works too!

Friday, August 24, 2012

A pony for my daughter

My last post was about finishing the Merida doll. I am happy to report that she has safely made her trip!
In that post I also referenced the post I made about Embroidering eyes. Well the project the second set of eyes belong to is now finished!


The Pony Pattern  is by VooDoo Tiki on Deviant Art
Read more about the making of behind the cut
The Cutie Mark is just something I made up, I couldn't come up with anything that symbolized my daughter, and she is too young to draw her own.

Friday, August 17, 2012

Brave are the Artists

Today I finished off the last of Merida's clothes and carefully packed her in a box. The children said their goodbyes, especially my daughter.
I had blogged about her hand embroidered face a while back
Her hair is quite red and full, the yarn I used is Homespun and I have used it in other colorways in the past. This time I didn't cut it in to strands but left it looped at the bottom, this means it will hopefully not all ravel off her head!
Her arms are jointed at the shoulder, her legs at the hip.

In the end she has a nicely rounded wardrobe of 4 dresses, a cloak, undergarments and a blanket.

Click the cut to see more on ALL the clothes this little girl has.