I had planed to have my first pattern available to pattern testers this month, but instead I am packing up my home to move to another state.
A big change for my family, undoubtedly, but we hope it will be a good one.
And thus I have not spent any time on my patterns for the last few weeks. My husband had just gotten the large printer to work 80% too. (we think it needs another ink cartridge)
Packing up your home always comes with stress, but also treasure.
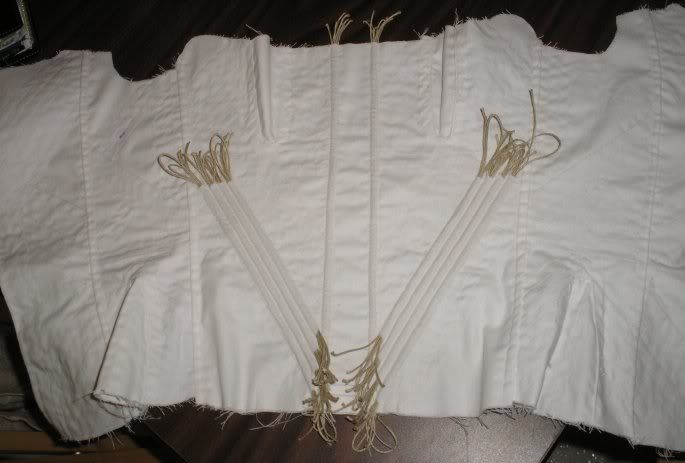
I found an early 19th century corset I was working on before I found I was pregnant with my first child (who is in kindergarten)
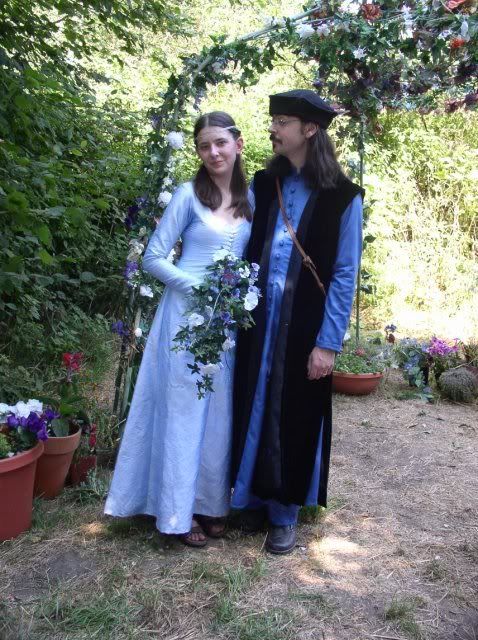
I found the pattern for my wedding dress! funnily enough I had the patterns for my husbands, but had misplace mine! I also found the flyer for the ren fair where we had our wedding, Couldn't toss it!
Yes that dress still fits! and it was made from 4 yards of silk that I picked up for $12 (not 12 a yard, all of it for $12!) It is a medieval styled gown the supports the bust all by it self. Being made from 4 yards of narrow silk, it is not very full in the skirt, but still nice!
Well that's the update from this side of the move. the next post will likely not be for a month, and hopefully from the other side of the move.
Some of you may know that I have wanted to start a pattern business for some years.
Well I am STARTING!
This is a preview of some of the patterns I HOPE to have in TESTING by the years end.
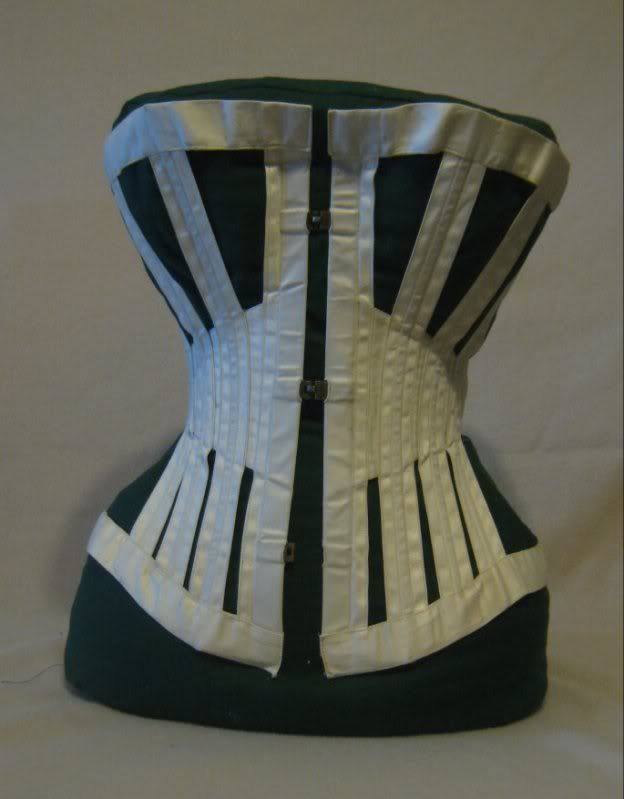
1870's Royal Worcester Skeleton Corset
(Multi-sized with instructions on making the unique busk and option booklet on the History!)
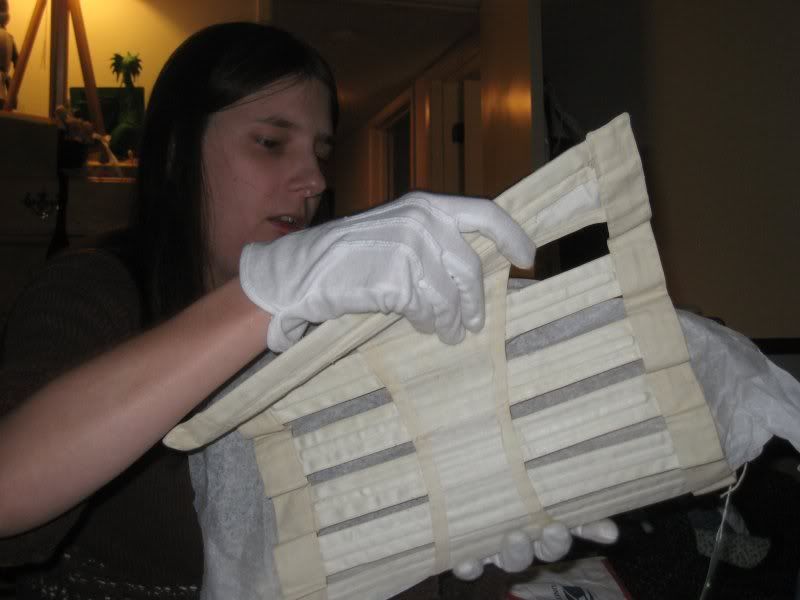
Yup I have two, 2, TWO in my hot little hands!
1810 Corset en X (Multi-sized with a few style variations)
Girls Regency dress (sizes 2-6?)
Currently it looks like the Corset en X will be in testing FIRST. But before I can get that far, I need your help!
Starting up a business has a lot of costs, there are registration fees and then buying inventory and supplies. Luckily for me, I have most of what I need to start.
This is a list of expenses I know I will have Very Soon:
Filing fees
Paper and Ink
Shipping supplies
Mailing costs
Software costs
Eventually I will have to add to this list:
New printer
Storage supplies for Original Antique item, Reproductions, and Patterns
Antique items to Study
Advertising
As well as the continued cost of Supplies.
How can YOU help?
Take a look at my Etsy Store. I have over 20 Vintage patterns, many in PLUS SIZES (which I am not) along with a few pieces of Vintage Clothing, fabric, modern patterns and other items. Yes I have more to list too, so keep an eye out for another post about that.
The more Vintage patterns I sell, the more space I have to store MY own patterns before shipping them out.
Don't see anything you like, but want to help, share this post.
Also keep an eye out for a post coming in the future about how YOU can test an upcoming pattern.
Thanks for Reading, I hope to have more news to share with you soon.
Today I learned that my Corset en X tied for win in the Improver category of the DPP, so I have moved on to the Finalist round!
Yesterday on a whim, I decided to try and find more information on the Musée Galliera stays that I used as my Primary inspiration. I had a very hard time navegating their website. So I decided to try another google image search trying a different combination of keywords, low and behold I found a better view of the back on a personal blog.
I did the back wrong!
As you can see the shoulder straps do still cross, but the lower strap is a bit different and there are all those ties!
I was not upset to discover I did it wrong, I knew when I made it that there was a good chance of it being incorrect, for example my choice to put in more boning is not consistant with the original.
My method of lacing the back, is still period plausable, backed up by the research I had posted.
As I said I had difficulties using the Musée Galliera website, particularily accessing the collections (broken links?) and posted on a more personal platform of mine, inquiring if others had trouble accessing it too. They did. One of my online Friends who has been very valuable in other research projects did how ever find the Museum accesion number and a better photo of the back!
Now I have been asked "Is it still Corset en X?" and my opinion would be Yes. Corset en X is a term picked up from a fashion plate from Costume Parisien April 15, 1810 Plate 1053 “Corset de tissu de fil en X”
This translates to English as “Fabric corset with ties in X.”
You can see the original here in the Collection Maciet at the Biblitheque des Arts Decoratifs (Upper left)
Or you can see it on Nuranar's flickr if the above link doesn't work. they are from the same source, as you can see by the A.D. stamp, I just normally chose to give links to the original, for legal purposes!
The shoulder straps DO cross, as do the other set of ties, thus from what I can see of the fashion plate, it still qualifies as Corset en X!
Is it “Corset Paresseuse?” Probably not. Because you will notice that there are 3 sets of small tape ties at the back that are tied together, rather than all being attached to the larger tie. More of them would have to attach to the larger tie, regardless if they go through eyelets or not, to be considered Paresseuse in my book. Based on the illustrations and text documentation I have found labeled Paresseuse from 1820 onward.
Now I know you have read all the way down here and are wondering where the PICTURES are!
Well I didn't want you to get distracted with the pretty, and I also do not have easy links for you! There are two methods to see the pictures, I hope at least one of them works for you!
First off is Roger-Viollet
go to Advance search and put in 1957.16.17 in the Accession number box. (Conversly if you are in the mood for Pretty, just stay on the simple search and put in Corset!)
The second method should get you to ZOOMIFY images, but is a bit trickier, so do try the other first!
This LINK should take you to the Paris museum collection search page. In the first box, select Musée Galliera
In the second type in Corset. Click the Blue VALIDER button. It will likely be on the second page. Again if you want more pretty, don't select an institution, just put in corset!
So there you have it!I did it wrong, (and just a day before I learned of my placing) and I am HAPPY to find this out! I have wonderful friends who help in my research, and this is why it is good to share research! If you hit a wall, don't give up, step back, or ask for help, other people see things differently and come at it from different angles.
To those of you who voted in the 2011 DPP, I kindly thank you for voting for the entry in each category that YOU thought was best, and I encourage you to continue voting for what you think qualifies as best. I know that varies from person to person, and that is what helps to make popular vote contests fun! and yes, there were some hard choices, and with the final round now up, there will be even harder choices.
I chose to make a corset style that I recently discovered that I have yet to see anyone fully recreate.
I present the Corset en X
Documentation
Fashion plate from Costume Parisien April 15, 1810 Plate 1053 “Corset de tissu de fil en X”
This translates to English as “Fabric corset with ties in X.”
You can see the original here in the Collection Maciet at the Biblitheque des Arts Decoratifs (Upper left)
Being one of the few fashion plates of corsets of the era, it has been redrawn several times.
Octave Uzane redrew it in his 1902 book "L’Art et les artifices de la beauté" with the title “Corset a le Indolente”
If you have Robert Doyle’s Waisted Efforts, turn to page 102 for his redrawing of this costume plate
This corset was the invention of M. (Louis-Charles-Augustin) Bretel, who also made the “corset a la Ninon”
Quote on page 98-99 of Corsets and Crinolines by Norah Waugh from February 1811 Journal des Dames et des Modes, “They are now wearing my corsets “a la Ninon”, those “in X”, and many others of my inventions with great success….” This quote leads me to think that the Corset en X is lightly boned, if boned at all.
The back lacing appears to be similar to what is often described as “Corset Paresseuse” which is similar to the later “fan lacing”. The term “Corset Paresseuse” was also used in French fashion magazines through out the century to identify corsets with wrap around backs. Paresseuse translates to Lazy, because they are supposedly easier to put on and talk off, they were often recommended for invalids.
The oldest mention of this style of lacing comes from William Booth of St. Anne’s, Soho, Middlesex, on May 31st, 1796 He was granted Pantent No. 2112 "An improvement in the making of stays and corsettes."
"In place of "the round bone that is common to the stays and corsettes before the oilet hole in the back," the patentee puts a flat bone and "secures two or more braces or straps to each back;" the straps are drawn through holes of suitable dimensions "in the opposite back." The holes are at a convenient distance from each edge, so that when the straps are drawn through, "the backs may fall over one another as much as the wearer may require." The straps are fastened in front or "at a convenient place near the peak" by a buckle, clasp, hook and eye or eyelet hole, as fancy may direct. "The back or shoulder braces or straps" are "drawn through their corresponding holes in the opposite back and fastened at or near the fore size by a loop fastened to the stay or corsette," or by other suitable fastening; the part "that passes upon the fore part of the shoulder" is to be elastic; after passing over the shoulder it is "drawn through loops in a back plate if a back plate is required;" thence it passes "to the opposite hip of the stay to be fastened by a hook and an eye" near the peak. The back braces or straps, hooks and eyes, &c. "are to be made so that they may be fastened with the right or the left hand alternately, or either, to suit the conveniency of the wearer."
Annonces et avis divers du département de l'Escaut
(July)1804, Page 54 and 58
Translated from French "Mr. Mollot merchant tailor Ladies & now residing in Paris trip, has the honor to announce to the ladies that just arrived in this city with a full assortment of corsets of all ages, of all sizes, and the newest kind. It has large breasts to square & narrow back, and Paresseuse to get dressed in a minuet without help"
Feuille de Valenciennes, Volume 2
(September)1807, Page 264
Translated from French "Mangin, Md. de Paris, A Good Faith St. Denis Street, no. 235, between me and the Little Lion Passage du Grand Cerf, warns That I just arrived in this city, for the Fair Avenue a very large assortment of various objects used, namely: ...Corsets à 1a paresseuse...."
Mrs. Gould, advertised in The Morning Chronicle, Monday, November 29, 1819, “among the most fashionable are the Circassian, Italian, and Parisian Corsets, with cotton bosom and backs. The Back being attached, acting on self-assisting principles, any lady may dress or undress in a short space of two minuets, without assistance.” This means that the bust is padded and there is an attached pad at the back. Thus, there is no need of tying one around the waist. The fact it is advertised as being quick to put on and take off with an “attached back” may mean that it is a wrap around style or closes in the front.
I accessed this advertisement via the British Newspaper Archive, which you must have a subscription to in order to view. (Well worth it actually!)
The Hermit in Philadelphia 1821
In Chapter 10 Foerign follies Page 154 “In the first place, our Ladies - for many of them actually require it - should without delay patronise the Armenian Divorce Corset, which according to the inventress, possesses the following attributes: 1. It gives to the bust, grace, elegance, and ease: - 2. An effect to dress, unknown in this, or any other country, and a form to the back, most surprising: - 3. It is devested of the trouble of lacing: - 4. It may be put on and completely adjusted momentarily, and without the aid of any individual! - The latter quality is invaluable, as it respects our male exquisites, who may now wear Corsets without even the knowledge of their body servants."
If you would like more documentation on Corset Paresseuse Lacing. Read Traité des bandages et appareils de pansement (Treated bandages and dressing apparatus) By Pierre Nicolas Gerdy, 1826, pages 327, and 339
By the way there is a short corset mentioned in this book and can be found illustrated in the book of illustrations, Plate XII
Manuel des dames, ou, L'art de la toilette
1827 Page 219-220 “To make the corset paresseuse, start by counting the number of eyelets of the corset, then cut as many pieces of flat wire braid tight, give these pieces about half a yard in length, sew each piece of cord to each eye, still toward the middle of the corset: it is, go all the cords sewn to the back left behind the eyelets of law, and put them back on the left behind, ready to close, and in each eye, made a wreath equally well, repeat this maneuver behind right, you pass the laces through the eyelets of left behind, and you still ask the same on the right behind: then collect all the strings left bundle at the end, sew them securely it and push them into a wide ribbon wire, about two inches long, which, folded in half crosswise, and whipped on both sides by its edges, envelope is all the ends of the bundle of cord, these beads are sewn in points back at one end of the tape, and they flap in the other end-to-point directions.”
Astute readers will note that this has been translated and reprinted by Frances Grimble in The Lady's Stratagem
There is a surviving corset in a French Museum that appears VERY similar to the Costume Parisiene Plate.
Secrets d’Elegance put out by Musée de la Modeet du Costume, Paris Galliera in 1978 is a Catalog of an exhibit of underclothing from 1750-1950
On page 12 is a B&W photo of the corset which is described as being dated to 1818. The corset is made of white ribbed cotton. The shoulder straps cross in back and are extened in the front with tape ties. Lacing in the back.
Original French “Corset. Vers 1818. Cotonnade blanche cotelee. Fermeture dans le dos, par des cordons. Larges epaulettes croisant dans le dos, prolongees par des cordons en toile se nouant devant sous la poitrine.”
I am in the Debt of Dawn Luckham who first posted this corset, and brought my attention to it. Dawn has even made her own pattern for a corset with this style of front. The back was unknown to her at the time of completion of her pattern. You may purchase this pattern at Spencers Mercantile I have shared the research I did into this corset already. Surprisingly I discovered all of this while looking for Corset Elastique! Sometimes you find what you are looking for, when you start looking for something else!
And most recently it was shown in the Juliette Recamier exhibition at the Musee de Beaux-Arts de Lyon in 2009
Dated to 1810, the corset is made of cotton ecru, with small whales under (though a close examinations leads me to believe that the correct translation is in) the breasts, laces and suspenders crossed in cotton, of French production.
Description on the bottom of page 13 of this PDF about the exhibit
Front on this page
Back just barely visible in the second photo of this page
I was very EXCITED to see a blury image of the back!
Taking a CLOSER look
Now I studied all 4 of these images closely and I came to the conclusion that they are all the same corset, even though the B&W image only shows one set of ties in the front. (probably the lower set)
So I started looking for seams and boning lines.
First thing I noticed is the center front seam. The second vertical seam is just in front of the shoulder straps. The front section is split at the underbust line, appearing to be a single panel around the ribcage and two panels with a seam in the center for the bust portion. One side has a triangular piecing, which I believe is not for shaping, but instead to make the piece big enough due to lack of yardage.
The center most bust portion has a line of stitching, which at first I thought was a gore. After closer examination of all three of the front images I came to the conclusion that it is just a line of stitching, possibly to hold boning. I also can just sea a line of stitching going parallel to the center front seam that appears to go down the entire length of the corset front. This stitching looks rather wide for a busk pocket.
There is also a seam at the side of the body, which can be seen in 2 of the images.
As for the back, well I only have the out of focus image, so I spent HOURS staring at it. What becomes obvious first is the shoulder straps crossing in the back, which is of course back up with the text. The shoulder straps appear wider at the shoulder than they do at the underbust when they tie in front. I believe I am seeing some sort of tape tie at their crossing in the back too.
The shoulder straps appear to become the upper ties in front, which leaves us with the question about the lower ties. I could tell that they attached to the narrow ties, instead of being a wide tie all around the back like this early 19th century corset from Vintage Textile
Now the question is, do the tapes go through eyelets or are they directly attached to the back?
IF the laces are sewn directly to the back then one would wrap the corset around the body, pass one tie through the laces of the other, and tie in front.
IF the laces go through eyelets then one has to wiggle into the corset and tie in front.
There is a soft corset,( no boning, busk, cording or quilting) in an American State Historical Society Museum (at the time of writing this, it is not listed on their website database, and the pictures were not for me to share) which has 4 tapes sewn to the edges attached to a tab which then ties in front. The shaping of this corset is cut very much like the Vintage Textile one shown above, simple side seams with a single gusset over each breast.
There is the 1830-40’s corset in the Los Angeles County Museum (M.63.54.7) as seen in page 86-7 in Fashioning Fashion. This corset has the laces passing though eyelets and then sewn into a band that is tied in front.
Rough development of my pattern.
I have come up with a method of drafting short stays, and used this method to make my pattern.
I noted that the placement of the side/front seam was just in front of the shoulder strap. I decided on 1” wide shoulder straps, then measured my full bust, under bust and lowest rib from an imaginary line down from the front armscye. After subtracting the 1” I made the lower front panel the width of the under bust, the upper front panels have a seam in the center, which accounts for the difference between the bust and under bust.
The side and back panels were then made after determining I wanted a 3” lacing gap . I knew the side/back seam was under the arm.
Strap lengths were measured.
The lengths of the back ties were laid out so that they ended before the side/back seam when laced closed.
I made my pattern in CAD as I do with most of my patterns.
Construction of my corset.
I have sadly lost the pictures I took while making it up.
First I sewed the upper sections together over the bust. The outside and lining were kept separate
Then I sewed the upper section to the lower front.
Then I sewed the center front seams.
At this point I laid the outside and inside wrong sides together and place the side panels over top ot them with the right sides together. Thus the seam was totally encased inside the corset, meaning there is no visible machine stitching on the outside or inside of the corset.
I smoothed out the side seam, then put on the back pieces in the same manner.
I decided that even though the original doesn’t appear to have many bones, I was going to bone mine. I used plastic cable ties as boning since I couldn’t find my artificial whalebone in the stash at the time. There are two bones on each seam and at center back
The busk I made from a piece of wood molding that was already rounded on one side! It slips into the busk pocket from an opening on the side, just like my Antique 1830’s stays I own. (shown below)
She shoulder straps on the original are a bit of a mystery. You can see that they are attached at the found and bound around the neck and armscye, but the straps that come around the front are not bound. The shoulder straps also appear a bit wider than the front straps in the back image.
I am pretty sure I did my shoulder straps wrong, because I didn’t have a good clear picture of the back.
My stays are bound in white cotton tape ½” wide, which goes nicely with the white cotton twill of the body. After all, bias binding wasn’t very common at this time.
Here is a Video of me putting on the corset, please note that while the video took me about 2 1/2 minuets while talking, it would only take me about 1 to actually put it on all by myself. This lacing method ROCKS! apologies for the children in the background talking and messing with the tripod!
UPDATE 3-5-2012
I have uncovered more research on this corset, please read it here!
Me in my vast wisdom ended up really crunched for time to make my children clothes for 12th night this January.
I ended up making my boys a very quick and dirty tunic. so quick and dirty that they were made in 1 day from 1 yard of 60" fabric, fits the boys who are wearing size 3-5 and I actually expect them to last for another year!
Here is a diagram of how they were cut out.
How to cut out:
Fold fabric across the width, so the selvage is at the hem of the tunic. yes this means the shoulder is on the fold.
Put a yard stick on the corner, angle it so that it reaches a point 7" in along the fold. Now take a square and place it along the fold and move it 1" out wards from the angled yard stick. this will make the sleeve set into a square seam, rather than an angled one. Cut this as a slight curve, not an angle.
for other side seam, put the hem point at 28" and the shoulder at 21", then angle it out 1" again.
This is the body piece.
The sleeves are 14" long and about 7" at the cuff. the easiest way to make them is to fold the fabric in half along the fold after cutting out the body.
The gusset is about 4" square.
The neckline is cut 5" wide, 1" deep in back and 4" deep in front.
This includes 1/2" seam allowance.
For making up in the quick and easy way, French seam by machine, use the selvage as a hem. Finish neckline by making a narrow hem by hand, I also like to do the cuff and hems by hand as it makes them less obviously machine made.
Right side out, (wrong sides together)first sew 1 side of the guset to the sleeve using just under 1/4", make sure to stop on the corner, do not go to the end of the gusset.
Then sew the other side of the gusset to the sleeve, then sew the sleeve seam.
Turn inside out and french the seams in the same order using a 1/4" seam allowance.
Then mark the shoulder point on the sleeve and the body. Right side out, (wrong sides together) sew from the gusset point around the sleeve, then the side seams.
Turn inside out and french the seams in the same order using a 1/4" seam allowance.
If you would rather flat fell the seams, the method would be similar to that I showed on my regency chemise, but without the sleeve being gathered at the shoulder.
This is a tutorial, that unlike others I have made does not require MATH! yes we will be using measurements, but there will not be multiplying, dividing, subtracting or even adding to make the patterns.
What you will need is: The child you wish to make the apron for, and a T shirt that fits the child. (plain shape, short sleeves is best.)
Tools include: Measuring tape, large sheet of paper, pencil and ruler. I like to use a square and a clear ruler. Also scissors for cutting the paper.
Overview of the FOUR styles
Left to right:
No. 4615 Advertised in Home Needlework Magazine, August/September 1910, Page 316"Children's and Girls one Piece Apron. 4615 Five sizes 4 to 1 2 years. The 8 year size requires 1 4 yards 27 inches wide 14 yard contrasting material 27 inches wide."
Farm Journal Patterns 4850 Advertised in Farm Journal, October 1912, page 550 Girls and Misses One-piece Aprons in 6 sizes; 6, 8, 10, 12, 14, 16 years. "A useful apron, cut in one piece, but prettily shaped, is shown, in No. 4850. Girls do not object to wearing aprons if they are pretty, and this one can be made exceedingly so. While white crossbar muslin, madras, or cambric can be used, very pretty ones are made of pink or blue chambray, hemmed or faced with the old fashioned rick-rack braid sewed along the under edge, so that a row of points extends beyond." This one is different from the first in that it meets at center back, likely closing with buttons.
Advertised in Woman's Home Companion, February 1913, page 75"No. 1439 One Piece Apron. 4 to 8 year sizes. Quantity of material required for medium size, or 6 years, eight yards of twenty seven inch material. The ease with which this attractive little school apron, which is suitable for any wash fabric, can be laundered is one of its practical features which will strongly appeal to every mother It is particularly attractive if made of a plain toned wash fabric with the edges scalloped in a darker shade or in a contrasting color."
No. 1230 Play Apron was also advertised in Woman's Home Companion, February 1913, page 75, "Play Apron with Pocket 2 to 4 year sizes. Quantity of material required for 2 years three fourths of a yard of twenty two inch material. The large pocket is a special feature of this apron."
Today I made the first mock up of my corset.
I used an old pair of pants from my husband as the mock up. I knew this would stretch, but that was okay for me. I was mainly interested in checking the length, and flap position.
I could not find my lacing strip. (I think a small child misplaced it for me) so I sewed the back closed and pined the front shut.
As I guess it stretched, as I was not very exact in cutting and sewing. I pined it all the way closed and my waist measurement was 27", which is normal for me.
But I did learn a thing or two about the pattern.
1. my guess on the waist was spot on! I know this because I put it on and tied a string around my waist and marked it.
2. It is way to high in the bust!
3. it is too large in the bust, as I guessed. I do not have that ratio.
4. the hips may be a bit large for me once I make it out of a non stretchy material.
5. I think the bust flaps are too big!
The waist is 24 1/2"
The hip is maybe 36"
The bust is about 36"
Wasit to top of corset at front is 7.5"
Waist to bottom of front is also 7.5"
(click on image to view full size)
I found it to be rather high in the bust, but the bottom length looks about right for the period.
To use this pattern, print out so that the squares are 1"
No seam allowances have been given.
Waist and grain-lines are given. Also are small red lines to indicate where a seam intersects that panel.
I saved the image and pulled it into Rhino CAD, I have an approximation of the sheet size deciphered from an older page that had a scale on it. I traced around the pattern pieces.
Then moved the pieces (thus removing the confusing background)and aligned them with the grain markings (little arrows)
Then I cut them apart to make a nursing opening. Added 1/2" seam allowance, and printed that sucker out!
At this point I have printed the pattern out and cut out my mock up from an old pair of my husband's pants!
I expect I will have lots of alterations to make, but I want to check out where it hits me as waist line and such.
Supposedly it has a 24" waist, I am normally about a 27" waist, so that is a reasonable size, but then I expect the bust and hips to be larger than my measurements. I also need to check the flap position.
The CADing of the pattern was done in one day, I have gotten fairly quick at it!
So like many costumers I will be embarking on a journey into the early 20th century for the anniversary of the sinking of the Titanic. A bit morbid? Sure, but also fun. I have never entered into this era.
I will need to make a nursing friendly outfit, just like all the ones I have made in the past 5 years....
I am quite pleased to be using Pintrest as well as some Facebook and Livejournal groups
First order of research was corsets, because let's face it they are my favorite!
The Met's (formerly Brooklyn) 2009.300.2759a–g has a busk and nursing flaps. the front is lower. also it appears that the lacing only goes to the waist. (too bad there aren't more pictures!)
Lara Corsets has a nursing corset that looks very similar to one advertised in 1915-16 Simpson's Catalogue as seen in Robert Doyle's Waisted Efforts, page 195