Tuesday, October 22, 2013

Pattern Testers make the world go'round

Lots of people make patterns, just take a look at Etsy to see how many indie pattern designers there are.
What sets apart a Good pattern from a GREAT pattern is how finished the pattern is, not just the design or the photos of the finished project, but the way it is written and illustrated. How well do the pattern pieces fit together, did it run true to size, any confusing steps?
Those are the things that a pattern designer will learn when they send their patterns out to testers.

What is a tester supposed to do?
READ the pattern, typos are always an issue, and sometimes a construction step will get lost in the writing process.

Rose Clearfield has this to say about proofreading:
Proofread and spell check. Again, it saddens me that I have include this, but I have seen published patterns with red underlined misspelled words on the covers. Check and re-check your pattern and then have at least one other person proof it for you. If no one at home is interested in doing this, see if you can send it online to a fellow crafter.
Varied readers. When I was writing my first pattern, I found it really helpful to have both people who do and do not make that particular craft (in this case, beadweaving) read over my pattern. Especially if you are creating a pattern that is suited for beginners, it's really important to ensure that the terminology that you use is appropriate and will not be confusing.
SEW up the pattern, especially if it is a garment patterns, as it needs to be tested on a variety of body shapes.

So what I am looking for? at this point ANYONE with ANY interest including but not limited to:
  • Modern Clothing for Women and Children
  • Historical Clothing for Women and Children
  • Corsets
  • Soft Toys and Dolls
  • Art Dolls
  • Accessories and other Crafts
Interested?
 
SIGN UP HERE

When I have a pattern ready for testing I will send out an e-mail with information on the pattern and a form to be filled out to apply to test the pattern. Then I will e-mail back those I selected to test it out.


Links of interest on this subject
Colette on how their patterns are made

Abby Glassenberg on How to recruit, manage and get the most out of pattern testers

Patchwork Posse wrote a lovely post on  requirements for pattern testers

Charming Doodle invited a few other PDF clothing pattern designers to talk about pattern testing and what makes a good pattern tester.

Elegence & Elephants wrote a lovely scale for the levels of their pattern testers experience when they called for pattern testers


*I have a small list of people already who are my readers only, so I really am looking for people to MAKE these items up.

Thursday, September 26, 2013

More Market Research and Holiday Planning.


I recently joined and online group for stuffed animal/plush/softies designers looking to improve/sell their patterns. It is still new, but so far the conversations have been good, kind, and helpful.

So I was spurned on to purchase a few patterns from popular designers, and am planning to make them up as holiday gifts. (with $ i made selling on etsy, no less!)

I then went on another free pattern download spree and have been looking at lots of patterns this past week.

Craftsy is a goo place to look for free patterns. they carry quilt, clothing, craft and toy patterns, as well as knitted and crochet and other goodies.
Modern patterns are not as confusing, most of the time.

In looking at all these patterns I learned a few things about myself as a PATTEN USER.

1. I like pretty first pages (covers) that DON"T smack of having been made in MS Word.
2. I don't care for step by step color photos.
3. I don't care for first page (cover) that is in landscape format, especially if it is the PDF in a portrait layout....

The reason WHY I like/don't like these things is that I PRINT OUT MY PATTERNS and then store them in sleeves in a binder.
1. is just an attractiveness/ professional-feel thing, and I know that I shouldn't judge a book by it's cover, but it is the first thing I see when opening the PDF, and my binder.
My first patterns were made in MS Word, and I am now playing around with other software to try and insert more personality/attractiveness.)
2. INK, it comes down to ink, which as we all know is money. I often don't print the pages, but instead read them on my computer. Now my computer is on the opposite side of the room from my sewing machine and if one is on, the other is off. Now I know many will disagree with me, but I see that I will NOT being doing photos for EVERY step, but just those that need it. I like B&W illustrations, and can do them for most things. Maybe I should look into doing both format for my customers? OPINIONS?
3. I know WHY patterns are done in this format, it is a common format for printed patterns to be sold in. and if I ever do manage to get my patterns in local stores I may just follow suit, but you won't find my PDF's done in that format.

I downloaded a lot of free patterns, discarding immediately those that were just a pattern page and few words on how to, or worse, a link to a tutorial. That isn't too helpful when you are just studying patterns, not actually interested in making the project.

Yes I did download several patterns that I will never make up, patterns for dolls, animals, quilts, clothes, even though I may not ever produce a quilt pattern, I can learn about what I would want my pattern to look like my looking at them.

Have you spent time looking at PDFs? what do you like/dislike about the ones you have seen?

I would recommend heading over to Craftsy and taking a look, keep the upcoming holiday season in mind, try something new.

Off to the sewing machine now, the fake fur is calling to me.

Market research is never ending, so don't expect me to stop posting about it anytime soon. :)

Thursday, September 19, 2013

My Little Brony: Costume Planing

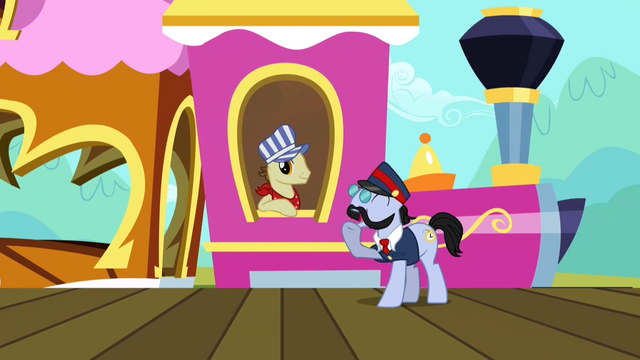
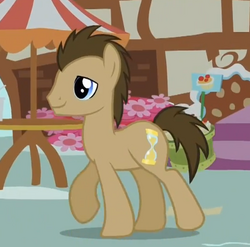
After talking with my children, the boys have decided that they want to be Ponies. My eldest was insistent that if his brother was going to be a Pony that he be a boy pony, so suggested Doctor Whooves which he liked. Then eldest decided he want to be the train driver pony
http://mlp.wikia.com/wiki/File:Conductor_pony_and_train_driver_S2E14.png
The Train Driver IN the train, not the Conductor outside the train.
We need to come up with a cutie mark for this pony, we think the engine will work well.

So I have already purchased fabric, left to right: Cotton knit, that I should try to dye for their shirts, Polar fleece for their hoodies, and twill for their pants. I believe I have brown fleece in the stash for the mane and tails. I also got an assortment of buttons for the pants and hoodies, I may need more but this was all my store had, will have to check other stores in area.


The sketched designs have already passed child approval.

PANTS and SHIRT
Shirt is knit and I hope will feature a design that coresponds to the whole costume but can be worn on it's own. Thinking of the Train engine for one and a cute Doctor quote for the other.
Pants, I don't need to buy zippers as I have been saving them from pants that my children and husband grow out of. I reuse a lot of old clothes, though they rarely become more than mock up material.
Eldest is a skinny boy who has trouble keeping his pants up, the ONLY pants he can wear sucessfully are the ones with the buttonhole elastic in them to adjust the size, and overalls. I intend to use this in the pants, so that IF they survive to be grown out of, the next child can wear them. My children rarely use back pockets, so those have been omitted, but they do have to have pockets. I will be doing a double layer at the knee of the pants, as that is where they wear out the most.
On the sides there will be the Cutie Marks, yet another reason why the back pockets have been omitted. I am not sure if these will be temporary or permanent, so I think I will hand sew them on. They will NOT be made of felt, but cotton.

HOODIES

The hoodies, and I am going with attached hoods this year, will have the Ears and Mane permanently attached, they will button up in front and I will be altering the pattern from last year, adding in pockets in the front. The Hat, Scarf and Tail will be temporary basted on. The Tail may stay on, or it may come off, depends on how the children deal with them.

The Docto's Fez and Bowtie will be basted or pined on, and since I knew what cutie mark he has, I have shown in on the side. Cutie Mark will be a permanent fixture of the hoodie.
I will be making a felt sonic screwdriver too, probably more than one so each my children can have one, but there are enough variations for that!


So that is my plan, I have most of the Materials, next up is Pattern Alteration!

Friday, September 13, 2013

Pockets for the Bed

Organization.
It's important. A place for everything and everything in it's place. Especially when your space is small.
I mentioned in the post about my Bed Curtains that the current living arrangement for my family is living with relatives and all sleeping in the same room. It is tight and there is NO space for books or toys in the bedroom. (though my husband keeps creating a PILE of books beside the bed.

School just started and we were practicing several weeks ahead of the actual start to get ourselves back in routine. Kids are slow in the morning, so one of the common pieces of advice about getting them ready in the morning is to have they get their clothes set out the night before. There is no place for them to do that in our room. Yes there is a dresser, and they could put their clothes on top of that, but it normally is buried under the stack of books from my husband and the lonely sock bin. I just removed those from these pictures.

Instead I thought that I could make a set of pockets to hang over their headboards (yes the actually headboards are arranged at their feet, it was how things worked in our room, I will explain things later.)

I went through my stash of novelty cotton prints and while I had all the fabric for the pink one, I still needed to get solid blue and green for the boys.

First up is the Eldest's bed. His bed frame is home made (re-purposed posts no less.) and is currently attached to the shelf frame over his bed on the far end. In a room with so little floor space, all storage (extra blankets, towels and out of season clothes) must go UP. His bed is too low to the ground for any under bed storage.

He likes Blue, Red, Vehicles, especially trains, buildings and Dogs, so I had been collecting prints from the Traveling with my Pets line by M'Liss for a while. this was an opportunity to use them.


Next child has an Extensible bed from Ikea and has an under the bed drawer/bin for some clothes. Bears and Tractors are just right for him. Pockets are of differing lengths inside and outside the bed to accommodate mattress height.


Last child also has an extensible bed from Ikea with a draw bin under it. This one required an actual pattern to be made because of the curve. The other two were done by just using measurements.


I LOVE these extensible beds from Ikea, they are twin width but you can set them shorter, they are currently set to their shortest to allow us to have some room to walk between the beds. The reason that the headboards are near their feet is so that they can have drawers under their beds without the third leg, which supports the bed in the middle, being in the way.

The tall dresser between the boys' bed is half Husband's and half Eldest. The dresser between the youngers beds is mine, the other large dresser is the kids' Most of Hubby and mine's clothes are hanging on the wall next to our bed behind the curtains. I also hang some on the wall between Daughter and our's bed, which I removed for photos.

As you can see from the floor plan above, which I made when we were trying to find a better layout for our room many months ago (I LOVE CAD!), there is just about 2 feet of walking space between all beds, the best we could do since we determined our children would not be safe in a bunk bed just yet. There is a laundry basket, for clean clothes, that lives between our and Daughter's bed, and a laundry hamper, for dirty clothes, that lives at the end of Eldest's bed, another laundry hamper is in the bathroom of course, and then there is always a pile of socks under my husband's computer table.....

Now the children haven't quite gotten into a routine of putting the next day's clothes in their pockets, but at least they have the option, and I USED SOME STASH! with 2 children at school, I foresee a lot more sewing in my future.


Wednesday, September 11, 2013

Hallows Thoughts

It is September and the Children have started school.

I am still not used to the idea of NOT having my boys for 6 hours, my daughter seems bored, and I don't know what to do with my time. I know that with time I will get a good routine down, but right now it just feels odd.

September, so close to October. October = Halloween. Halloween = COSTUMES!!!!

So I find myself asking the children ever so briefly what they would like to be for Halloween. The boys will need some sort costume that they can put on at school for the festivities. (They can't wear the costume all day.) and it wouldn't be fair to leave the girl out so she will need something as well.

I am thinking of finishing up the Rainbow Dash dress I started for her birthday and still haven't finished.
 It is a 3-piece ensemble, dress, jacket with wings, hat. Oh and I made matching shorts as well. It isn't finished because some child mucked with the settings of my serger and I couldn't get it back in synch in time for her B-day.

So I have a plan for one child, even though she keeps saying she wants to be a kitty, and I remind her that she was one last year.

I so far have not gotten an idea out of the boys, and am thinking that once they see their sister is going to be a Pony, they may want to be one too. I think I could convince one to be Doctor Whooves, seeing we are Doctor Who fans of many years (3 is my fave) but I don't really have another male pony that they would want to be and am concerned about sending them dressed as a female character. I will if it is what they want though, and I think they would be cute. Out of all the Mane Six, Rainbow Dash would be the easiest for a little boy to dress up as, but that is already taken in our family. AppleJack would be a good choice too an happens to be one of my boy's favorite Pony.
http://mlp.wikia.com/wiki/Dr._Hooves


Then *I* want something new and shiny to wear. All this thought of costumes is so much fun I start to feel left out.

But then the cynic in me asks "What is the point?" We will not be trick-or-treating, the children cant eat anything they would get, and I only some of it, my husband less. We are not likely to be invited to any parties, so why should I bother dressing up?

Last year's costumes worked out well, the children have used them as clothing and enjoy their hats very much, it was a win. a bit of a cop-out for a costumer, but a win. I had them finished ahead of when they were needed, they were loved and USED more than once. In fact my daughter is now sporting the shortest hair of my children since she found scissors, so I expect her to be wearing hats quite a bit in the upcoming months as it gets cooler.

Then I think of those UFOs I have. I am especially thinking of the Codex I started when my daugher was a baby (it was nursing friendly no less) but I ran out of time and ended up whipping up a gnome hat and being a gnome with my daughter and husband.
You can see the Codex staff my husband made me is quite shiny! That is my default ren dress by the way, LOVE it!

So Codex has sat in a box for almost 3 years, I should finish it. (Take out the nursing access if I can.) Then I will have something to wear to the local comic and Sci-Fi conventions! Yes that's it.

It is @&$# Halloween, I SHOULD dress up, it is part of the costumer's creed is it not?

Now to get that sewing space back in order.....

Tuesday, September 3, 2013

New School Clothes

School starts in a few days here, but my family has been getting ready for weeks. We are now waking up and getting ready on schedule, all the school supplies have been gathered up, and some new clothes have been purchased.
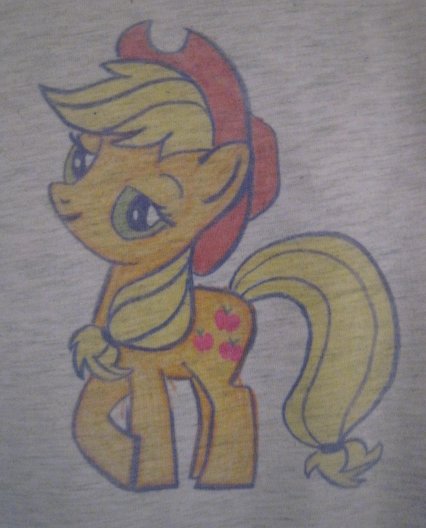
My middle child asked for a shirt with Applejack in her hat on it. now most My Little Pony shirts are rather girly, either pink or purple or in a girl cut.
So I set about to make him one. I settled on using Fabric Crayons.
This is how it turned out
And a close up. I think it looks artistic on that heathered fabric.
Then my elder son, not to be left out, asked for a train with ponys riding it.
This image took more time to just find and create, but here is the front of his shirt.
 This design begged to go around the body of the shirt, so that is just what I did. it was hard to get the color in the seam.
And the back of the shirt
I decided to not stick with the pony color scheme of mostly pink, and indeed I found one image where the engine was blue, this would be more suitable for a boy's shirt.
The pony heads are about the size of a coin, so they were hard to do in crayon since it doesn't do detail very well.
 I put Applejack and Rainbow Dash in one of the coaches. (Yes I know I did dash's mane wrong)

This design goes about 3/5 of the way around the shirt. I decided against joining the train tracks around the rest of the shirt.
In order to do a design this large I used three sheets of paper, and cut out the car in front so that I could easily piece it together.
I did learn that I need to put the designs further into the paper, not on the edge, and you can see why in the pictures.

They will likely wear these shirt on the first day of school.

Tuesday, August 20, 2013

Waiting for her ship to come in

I was working right up until the deadline on my mermaid for the Doll Street contest.
I already showed a peek on here and explained the tale of her being tattooed in my last post.
Judging has been done and I can now share pictures of my finished mermaid.
She did not place in the contest, but you can see the winners on Doll Street.
The whole lot of 39 entries is here 


When the conest was anounced I set out to find some inpsiration. I could have just made another of my pregnant mermaid dolls that I designed when I had my first child, but I love coming up with something new.
I started a Pinterest board and quickly fell in love with Twin/Double/Split tailed mermaids.
These mermaids have been around since the Middle ages, and it is likely you see one very frequently as the Starbucks logo


So I now thought about how to pose my girl's tails. I decided to go with an upright position, and since I had fallen in love with George Barbier's mermaid illustration for Les Liaisons Dangereuses I thought it would be fun to go all out with an 18th century pannier and corset., the skirt pulled back so that you could see she had tails rather than legs under those skirt. Sort of like these two inspirations, but that wasn't going to be, like many dolls she had her own idea.

I drew up my pattern by hand, for some reason I still like making my doll patterns with pencil and paper. I didn't even bother making a test, and the body worked out just great the first time. I bent a wire hanger into an armature for her.
Yes she is quite hippy! One of the things I like about her tails is that they do not stick straight out to the sides, but slightly towards the back, this was accomplished with the pattern pieces, not the armature. I am pleased with my pattern drafting skills in that regard. Her breasts turned out perfect, her backside was a bit flat, but that should be easy enough to change for the second doll. (yes I am already planing a second one!)

I stuffed up the body and got to work on sewing the lace to make her scales.
That took FOREVER! I spent much of my "free" time (being a mother to young children out of school, there wasn't much) sewing yards and yards of lace on to her tails. I carted her around to swim lessons in a bin, and as the deadline grew closer, got up early and went to bed late. I don't know how many yards of lace I used, it was gathered, but I pulled that off and regathered it. I used three different laces to cover the tail, all of which were gifted to me, in fact This entire doll was made from stash materials!
I used one lace for the tail fins and around her waist (carefully shaping around the motifs.) another for the majority of the scales, and a third for the upper thighs, mixed in with the main lace. It got to be very difficult sewing the lace up between the tails. but I got it all evenly covered, and hopefully with only a few weird looks from the fellow parents at the pool (she is putting that needle where?)

After I had all the lace on, I only had about 3 days to make the head and arms. I had not patterned them when I patterned the body, so back to the drawing board I went, first batch didn't work. I had forgotten how to properly turn fingers as I hadn't made a doll like this in years.

I eventually got a good set of hands, upper arms, head and ears.

I pined the head and arms on and played with positioning them. I had wanted to create more movement with her upper body, so I used a two-piece arm pattern. This was my first time doing arms this way, I normally make a shaped single pattern or a jointed two piece pattern.

I stitched lines in the palm of her raised right hand to sculpt it, but not the left, which is on her hip. I am pleased with how her arms turned out and will have to use this technique again in future!
 I also sculpted around some beads to give her elbows. Just like I had done so around smaller beads to give her nipples.

The face was done with paint, markers and pencils. Her ears are sculpted. I do so love adding ears, it is a nice little treat behind the hair. I learned how to make ears from a Soft Dolls & Animals article "Cloth Dollmaking Techniques: Let's Hear it for Ears" by Gloria J. "Mimi" Winer in the APR/MAY 2002: Volume 6, Issue #3
She has a pompom in her nose and her features are needle sculpted.I have misplaced some of my pens for doing faces, and will need to replace them. Ah the perils of moving, I am still looking for things, and half my stash is in storage still.
I debated giving her jewelry, she could wear earrings and rings after all, but decided to keep things simple. Maybe later she will find something she likes.

Of course by now I knew I wasn't going to get to make a corset and panier for her, so when it came time to give her some hair, I pulled out all the choices. I ended up going with Wavy Locks by All Cooped Up Designs in Light Brown. I gave her a side part by using clear thread, the rest of her hair is needle felted down.

I gave her a second tattoo to go with  sailing ship. She may recieve more later, it is her skin after all. I felt like my mermaid is waiting for her Sailor love, which is why I kept with the nautical theme for her ink. She doesn't have a name yet.

I added a bit of color to her scales at the fins and waist with pen, at my husband's suggestion. the color of her skin was chosen to be close to the color of the lace I used for scales.
 She is actually balancing on her own in these pictures due to the background I gave her, but in reality she needs a stand made for her. as she does not stand on her own.
I hope these last photos give you a sense of just how her tails are positioned, I am really happy with how well she photographs from different angles, each is an interesting perspective in it's own.


So I spent a lot of time working on my doll, and right after I had submitted my form that evening I was redirected to another webpage (which I can't get to any other way off the main website) that informed me that my entry was half an hour late! There was no time due on the original rules page. Now I am used to other international online communities hosting competitions with times due in a set time zone, YWU and FR do this, and I had double checked the rules that morning to check that info.

I was greatly upset and I hastily sent of an e-mail to admin with all my entry information and the fact that I was disappointed the time was not on the original webpage. I received an e-mail back from the admin stating that my entry would be accepted. I hope that the next contest has the time issue sorted out and posted in a more obvious way.

Saturday, July 27, 2013

By the tail

Ah summer, Hot weather leaves us longing to cool down, so we go in search of water, the ocean, lakes, rivers and swimming pools.

Many creatures love water, even fantastical creatures, take the mermaid for instance.
 
I am currently working on my entry to Doll Street's Mermaid challenge.

Here is a sneak peek at what I have been working on.

Her torso has shaped nipples, which I lightly colored with pencil. When I had set it down to do other things, my 3 year old decided that she should color on the doll as well. I tried hard to erase the blue pencil, and was left with a faint smudge that resembled a bruise on her abdomen. I drew the sailing ship in micron over the smudge, thus my maiden has been tattooed. I think she will need at least one more on her arm to go with it.

For her tail, I wanted to giver her some texture, so I have been gathering up lace, in a scallop to create scales. this has been quite a lot of hand sewing, which is not comfortable to do in high heat when you hands are sweating. I hope that it reads as scales in the end.

This photo shows it not even halfway done, yet several hours of work, each row is 1/4" above the row behind it. I am using two needles, one to gather the lace, in a scallop shaped, which when pulled taught creates scales, the other to stitch down the lace using a back stitch.

Tuesday, July 16, 2013

Between two camps

As an artistic person, I adore Individuality and Uniqueness.
We seem to walk between too camps. one being the copycat, following what the "cool" people do, the other blazing our own way, perhaps alone.

You ever see someone do something really cool, and you think to yourself "all the good ideas are gone"?

We want to stand out in a crowd, but not like a sore thumb. We want to fit in just enough to not disrupt the overall harmony.

An example that the costumers can relate to is the 18th century Curtain-Along as instigated by Jen Thompson of Festive Attyre when she saw the Waverly curtains at her local hardware store.

The print came in three colorways and many costumers have picked them up to make costumes from. They run the gamut from 18th century panniers to Regency, and I have even seen a Victorian ensemble made from them.

Many of these costumers thought long and hard about what to do with their curtains, not wanting to make the same thing as someone else, sometimes even changing their plans.

I cant tell you how often I have worked on something in secret, just so that I didn't get copied, only to find out later, someone else had already thought of the same thing and I didn't want to be thought of as copying THEM.

It is a delicate balance that we must walk.

Sunday, July 7, 2013

Swim Suit Season

Making a Girl’s Tankini from McCalls 6729
It is summer and that means Swimming!
Which of course means having a swimming suit. I have a young daughter and I couldn’t find anything in local stores that I liked.
  • I wanted a 2 piece so that she could go to the toilet facilities easier. She hasn’t been potty trained that long, I thought a 2 piece would be easier, and I have always hated having to peel off a 1 piece, and worse yet, putting the wet suit BACK ON!
  • I DIDN”T want something that would be considered overtly sexy on my body, she is a little girl, and is going to stay that way for some years to come.
  • I didn’t want characters or obnoxious prints. 
So I settled on making one for her. She picked out the fabric, which really was the only good choice to be had and I picked up McCalls 6729 since that was close to what I wanted and McCalls were on sale.

Overall I found the pattern to be adequate, with the exception of the elastic guides. The elastic guides are of course graded over the 4 sizes given, the instructions say “Lap ends matching Center Backs” but the center back markings are NOT graded. It would have been easier if they had said lap ends a certain amount. So I had to guess.


I did not use fold over elastic, but instead cut strips 1 1/2" wide the length of the guide, this was a bit bulkier but has a harmonious look.
I decided to not cross the straps in back and so far that has worked well. The suit has stayed in place and she can get it on and off by herself.
I need to work on sewing knits, I am not that good at it and my machine skipping stitches does not help! I sewed this on my regular machine using a stretch stich and zig zag for the bindings and elastic.

I thought I would share the skirt pattern piece I created for sizes 3-6, you will still need the original pattern.

So here is the additional pattern piece to making a Tankini from McCalls 6729!

 Tankini Adaption for McCalls 6729