Showing posts with label patterns. Show all posts

Friday, January 10, 2014

Custom Plush Pattern Making

Do you have an idea or even a drawing, and you want to turn it into plush?

Do you know how to sew, but can't seem to wrap your brain around how to make that 2D drawing into a pattern for a 3D plush?

I am gifted with a brain that translates 2D to 3D well, especially after years of studying dolls, plush and patterns.

I will create for you a PATTERN for you to create your creation in fabric

 Pricing STARTS at $50 on Etsy, some additional charges may apply, read the full requirements HERE


Here is an OLD example from 2004. My young cousin filled a couple of pages with drawings of aliens. I took those pages home and created this Alien and his spaceship for my cousin. I wonder if he still has it?


The spaceship's vinyl top buttoned on in case it needed to go into the wash. It is supported by cable ties in the solid sections, helping it to keep it's shape. Two zippers on one section allow access to the cockpit.


The pilot's chair swivels on a doll joint and has elastic straps to hold the pilot in place.


Once again you can start the process of having your design become a hugable plush animal or doll by checking out this listing on Etsy

Monday, December 2, 2013

Shapes around us inspire us.

Have you ever looked at an object and wondered how you could make it out of fabric?

I find myself doing this all the time. I have studied banana peels, my own hands, boat hulls, the list goes on.

It is winter here in the Pacific Northwest, which means the grocery stores are carrying Satsumas, Clementines and Mandarin Oranges. We like them as snacks, so easy to peel, portable, relatively seedless and sweet.

Of course we always try to get them unwrapped in one piece, it just makes the eating process more fun!

What do you get when you lay that orange peel flat? Why a Spiral of course!
And that is the inspiration for my newest pattern!


A set of 4 spiral shaped ornaments, here is just one of the shapes.
The pattern has been through one round of testing already and having received feedback, I have improved the pattern shapes and instructions as well as added a fourth shape. I will be calling for a second test on Wednesday. Would you like to sign up to be a pattern tester?

Tuesday, November 19, 2013

Hippo Birdie to ME

I am celebrating my birthday this week!
Earlier in the month I was laying in bed thinking about my last birthday party a few years ago. My dear friend had brought Kinder Happy Hippo Cocoa Biscuits (cookies) and I teased her about not bringing anything bird related and then it could have been Hippo Birdie, which many of you will have ran across on the internet as a birthday greeting (corruption of Happy B-day?)

Inspiration struck and I got out of bed and pull out some visual dictionaries and animal drawing books. I found How to Draw Animals by Jack Hamm to be particularly helpful as it covered hippopotamus.

I drew a rough sketch of what my Hippo-Bird mashup should look like with seam lines and then went to bed, having formed the plan of releasing the pattern as a birthday celebration.

A few days later I did a quick internet search to see if Hippo-Birds were commonly illustrated, and satisfied that there wasn't already an obvious plush pattern on the market, I drew up the pattern pieces and made my mock up, using old sheets.

Mock up 1, which I still have, and will not show you the pictures of was a success for the most part, I did simplify a few things. Out of the 11 pattern pieces, only 1 was unchanged.

I then sewed up the second one out of grey cotton, noticed a few minor tweaks were needed (dart length, seam alignment) I then put my pattern into CAD and cleaned it up. I then scaled it down to be 2/3 of the original size and made up the second one in blue.


Monsieur requested a mustache, I couldn't deny him, it being Movember and all.After making up several felt mustache shapes (too fake, Snydly Whiplash, Kaiser), my husband decided on the final shape and I gave Monsieur his mustache and bow tie.


I then wanted to see how the pattern would translate to Polar Fleece, so I made up Prudence.
There are a few differences in construction between the cotton and fleece versions. The fleece, being a knit sculpts better, however being thicker means that the ears have to be single layer. I also used safety eyes on Prudence to check a different look.


Pattern is now available on Etsy. Also available on Craftsy


One of my favorite things about this pattern is the nostrils! They are created using a tuck dart as a starting point so they truly have depth to them.


All the while I was making these Hippo Birdies I was planing how I would stage the photos.

I used Abby Glassenberg of While She Naps' Tutorial on making Mini Felt Bunting, while at the fabric store I looked for cake or birthday fabric but all I found was some ribbon, which I bought since it went so well with the dots I was going to use for the cupcake wrapper. I made felt party hats, and then the girls got aprons. I also made up a cupcake complete with pink icing and a colorful wraper. Decided it needed a candle as well.


The cupcake is not included in the pattern, it will be part of a forth coming pattern for play food.

Know someone with a birthday coming up and have no clue what to give them? The Hippo Birdie just might be the thing.Pick it up on Craftsy or Etsy

Hippo Birdie to ME


Tuesday, October 22, 2013

Pattern Testers make the world go'round

Lots of people make patterns, just take a look at Etsy to see how many indie pattern designers there are.
What sets apart a Good pattern from a GREAT pattern is how finished the pattern is, not just the design or the photos of the finished project, but the way it is written and illustrated. How well do the pattern pieces fit together, did it run true to size, any confusing steps?
Those are the things that a pattern designer will learn when they send their patterns out to testers.

What is a tester supposed to do?
READ the pattern, typos are always an issue, and sometimes a construction step will get lost in the writing process.

Rose Clearfield has this to say about proofreading:
Proofread and spell check. Again, it saddens me that I have include this, but I have seen published patterns with red underlined misspelled words on the covers. Check and re-check your pattern and then have at least one other person proof it for you. If no one at home is interested in doing this, see if you can send it online to a fellow crafter.
Varied readers. When I was writing my first pattern, I found it really helpful to have both people who do and do not make that particular craft (in this case, beadweaving) read over my pattern. Especially if you are creating a pattern that is suited for beginners, it's really important to ensure that the terminology that you use is appropriate and will not be confusing.
SEW up the pattern, especially if it is a garment patterns, as it needs to be tested on a variety of body shapes.

So what I am looking for? at this point ANYONE with ANY interest including but not limited to:
  • Modern Clothing for Women and Children
  • Historical Clothing for Women and Children
  • Corsets
  • Soft Toys and Dolls
  • Art Dolls
  • Accessories and other Crafts
Interested?
 
SIGN UP HERE

When I have a pattern ready for testing I will send out an e-mail with information on the pattern and a form to be filled out to apply to test the pattern. Then I will e-mail back those I selected to test it out.


Links of interest on this subject
Colette on how their patterns are made

Abby Glassenberg on How to recruit, manage and get the most out of pattern testers

Patchwork Posse wrote a lovely post on  requirements for pattern testers

Charming Doodle invited a few other PDF clothing pattern designers to talk about pattern testing and what makes a good pattern tester.

Elegence & Elephants wrote a lovely scale for the levels of their pattern testers experience when they called for pattern testers


*I have a small list of people already who are my readers only, so I really am looking for people to MAKE these items up.

Thursday, September 26, 2013

More Market Research and Holiday Planning.


I recently joined and online group for stuffed animal/plush/softies designers looking to improve/sell their patterns. It is still new, but so far the conversations have been good, kind, and helpful.

So I was spurned on to purchase a few patterns from popular designers, and am planning to make them up as holiday gifts. (with $ i made selling on etsy, no less!)

I then went on another free pattern download spree and have been looking at lots of patterns this past week.

Craftsy is a goo place to look for free patterns. they carry quilt, clothing, craft and toy patterns, as well as knitted and crochet and other goodies.
Modern patterns are not as confusing, most of the time.

In looking at all these patterns I learned a few things about myself as a PATTEN USER.

1. I like pretty first pages (covers) that DON"T smack of having been made in MS Word.
2. I don't care for step by step color photos.
3. I don't care for first page (cover) that is in landscape format, especially if it is the PDF in a portrait layout....

The reason WHY I like/don't like these things is that I PRINT OUT MY PATTERNS and then store them in sleeves in a binder.
1. is just an attractiveness/ professional-feel thing, and I know that I shouldn't judge a book by it's cover, but it is the first thing I see when opening the PDF, and my binder.
My first patterns were made in MS Word, and I am now playing around with other software to try and insert more personality/attractiveness.)
2. INK, it comes down to ink, which as we all know is money. I often don't print the pages, but instead read them on my computer. Now my computer is on the opposite side of the room from my sewing machine and if one is on, the other is off. Now I know many will disagree with me, but I see that I will NOT being doing photos for EVERY step, but just those that need it. I like B&W illustrations, and can do them for most things. Maybe I should look into doing both format for my customers? OPINIONS?
3. I know WHY patterns are done in this format, it is a common format for printed patterns to be sold in. and if I ever do manage to get my patterns in local stores I may just follow suit, but you won't find my PDF's done in that format.

I downloaded a lot of free patterns, discarding immediately those that were just a pattern page and few words on how to, or worse, a link to a tutorial. That isn't too helpful when you are just studying patterns, not actually interested in making the project.

Yes I did download several patterns that I will never make up, patterns for dolls, animals, quilts, clothes, even though I may not ever produce a quilt pattern, I can learn about what I would want my pattern to look like my looking at them.

Have you spent time looking at PDFs? what do you like/dislike about the ones you have seen?

I would recommend heading over to Craftsy and taking a look, keep the upcoming holiday season in mind, try something new.

Off to the sewing machine now, the fake fur is calling to me.

Market research is never ending, so don't expect me to stop posting about it anytime soon. :)

Wednesday, April 24, 2013

Getting aHEAD

After making the Pink Zebra and changing the pattern, I cut into my intended fabric, knowing I had enough to make a second pony if the pattern was still not to my liking, this time I used the proper grain as I was working with a solid, not a print.

I also choose to make this pony standing I actually have about 4 poses made into patterns.

If I thought the last pony had a funny head, this one has a stupid head!

The body, how ever, is good, though I think the legs need to be longer to match Applejack better, as is they work more for her little sister Apple Bloom

So I am taking the stuffing out, unstitching the head and making a new one, raising the ears and giving more chin. At least my child is happy with it as is, but I just couldn't stand looking at this face for long.

Tuesday, April 23, 2013

Testing YOUR OWN Patterns and offering Free patterns.

I mentioned in my last post that I was working on making a plush Pony for my child as a Birthday gift.
Since the pattern was not as I hoped I have had to revise it. and this lead me to thinking about how You as Pattern Maker should test your own patterns before sending them out to pattern testers.

Why should YOU test your OWN pattern?
1. To test a different order of operations,  maybe it works better done in a different order
I put the Pink Zebra together in a order that was complicated, so I need to try a different order to streamline the process, especially if I ever release it as a pattern (which I don't know if I will.)

2. To double check your pattern pieces. If you made the pattern pieces by hand and then scanned them into the computer and cleaned them up, you need to know if they print out appropriately. If you put them in a different format, like a PDF, you need to print from that format just like your customers would.

3. To check your instructions. Assuming that you have written the instructions at this point, if not, you should make it up following your instructions precisely once they are written. If you have ever written a report, you know that the common advice is to print it out and read it from the paper, or better yet, have someone else read it. Sometimes it is easier to miss your mistakes on the computer.

4. To check all variations and sizes. I have heard of clothing patterns that didn't work out in the plus sizes due to grading errors, not only is this annoying, it can be damaging to your companies reputation.

What if the first iteration of the pattern doesn't work?
You obviously need to change it, make notes on the pattern pieces of what needs to change and where the changes need to be.

Should you toss the nonworking pattern or save it?
This is a personal opinion, but I say save it, at least until you have the FINAL finished pattern. DO make sure to label your patterns with a version name or number so that they do not get confused and printed by accident (it happens, even to the bigger companies.) For a paper pattern, use a colored ink, for computer files, change the name just a bit. Version 1, V1, and 1.0 are all good names.
When you have the final pattern you may choose to toss or delete, but my persona preference is to put the previous iterations in a smaller envelope inside the main envelope, that way I have them for future in case I need to go back to them.
Yes my handwriting is that bad, which is why I love using the computer!

Is all this necessary if you are only giving the pattern away for free on your website or blog?
Depends on your end goal, and general view. While there is the common thought that "you get what you pay for" with free patterns, IF you are also SELLING patterns, your freebie is what will draw in or send away potential customers. If your free pattern doesn't work well, why would anyone choose to pay for a pattern? They are expecting that all your patterns are done in the same format, and if they had a bad experience with your free pattern, they are not likely to want to "waste" their money on buying a pattern.
IF you are just a blogger sharing, how well finished your pattern is, depends on the level you want to put into it, and what you expect of your target audience's skill level.

One more word on Free Patterns, IF you didn't test it even though you are 100% sure it will work, put a disclaimer on it. If you didn't test all the variations and sizes, put a disclaimer on it. "This pattern has not been tested at this point" is fairly clear, on the other hand "This pattern has been tested by me (and others if applicable) and works" is a lovely way to give your viewers confidence about your free pattern.

Wednesday, April 17, 2013

A question on geometric pattern pieces

We will file this under Market Research.
Audience Participation is highly encouraged!

I have been thinking about what to do about large rectangular and square pattern pieces in my patterns.

The Big 3 ALWAYS include all pattern pieces, which annoys me when you are dealing with large rectangles for say an 1860's skirt. (I would just measure the pattern pieces, or better yet ME and then cut the appropriate widths)

When it come to printing out a downloaded pattern, large rectangular pieces can be wasteful of paper, ink and tape.

So I am currently leaning towards NOT including rectangular or square pattern pieces in my patterns. (circles and non right angle triangles can be difficult to make, so I will include those)

Instead I will mention the sizes needed to be cut in the layout, instructions and on the pattern pages.

Do you think this would be too confusing for a beginner?

I am not talking about anything quite as complicated as the below image, which requires working in Nails (2 1/4") and more math, but of cutting a rectangle A long and B wide (including seam allowance)


Workwoman's Guide by A Lady 1840  Plate 6 concerning the making of Women's Shifts.on Google Books

Thursday, March 28, 2013

How do you store your patterns?

I moved my computer desk recently, which required me to clean it off! in the process I found no less than a dozen patterns that needed to be put away. I thought this would be a good time to share how I store my patterns.

First off, there is no right way to store patterns, what works for me may not work for you.

I have several different patterns, of several different types and I have different methods for storing them.

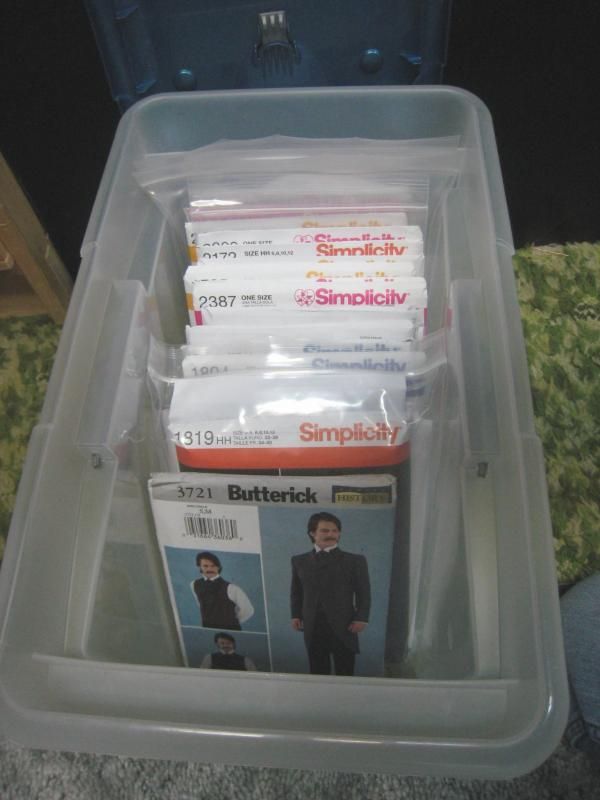
First off, the Big Three (Simplicity, McCalls, Butterick)
I store these in what are often sold as File storage, and indeed they are intended to hold hanging files.
I like them because they are clear so I can see which type of patterns are in them. I also often make a label for the bin. (historical costume, costume, craft, mundane, McCalls, Simplicity, Butterick.)

Initially when I start a new bin, they go in this way, as it is easier to flip through them, but as the bin gets more full, I turn them 90 degrees and put in two rows. This works well for Simplicity and Butterick, not so much for the McCalls patterns which are just a bit wider.

Since these bins are designed for files, you can store all most all sizes of patterns in them, you just have to orientate them efficiently!

If you have a few patterns, this will work well, but if you have lots (I have enough to fill a half dozen of these bins) it is not really the best storage option, they are not square on the outside and thus can take up a bit more space than they need.

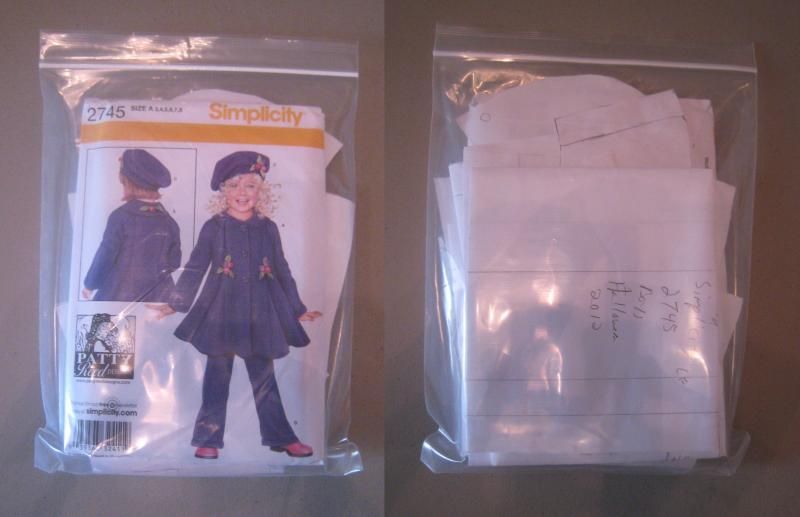
You may have noticed that some of those patterns are in zip top bags.
This is because I have USED the pattern.  I ALWAYS trace off the pattern, never cutting the originals. I do this for several reasons
  • tissue paper tears
  • I need to make more than one size
  • I need to alter the pattern
  • I want to be able to give or sell the pattern intact someday
This is Simplicity 2745 which I used to make coats for my children for Halloween 2012 you can read my review and the pattern alterations I did to it.
Please note that I wrote the pattern number, size and pattern piece on EACH pattern piece in the bag.

By the way, the bag size I use for Simplicity patterns is 8X10 and 2mil is fine for storage.

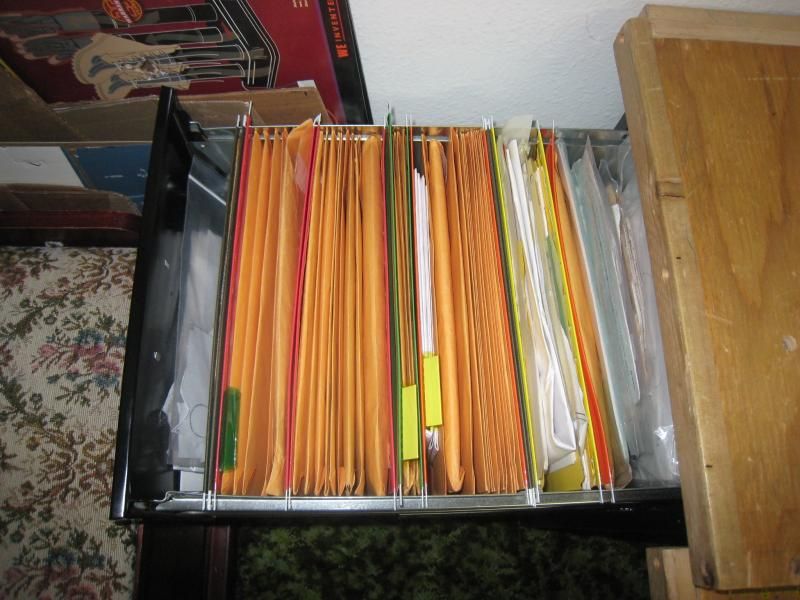
Many of my patterns are actually stored in my file cabinets. My computer desk is a table top over two file cabinets, home made from re-purposed wood, it is not the prettiest, but VERY functional, and not hard to move once the file cabinets are emptied and the top is just lifted off. (yes we think about these things in our furniture)
Here I have them organized a bit better, most are in paper envelopes, but some are in plastic bags. This is where I store my larger Historical patterns.

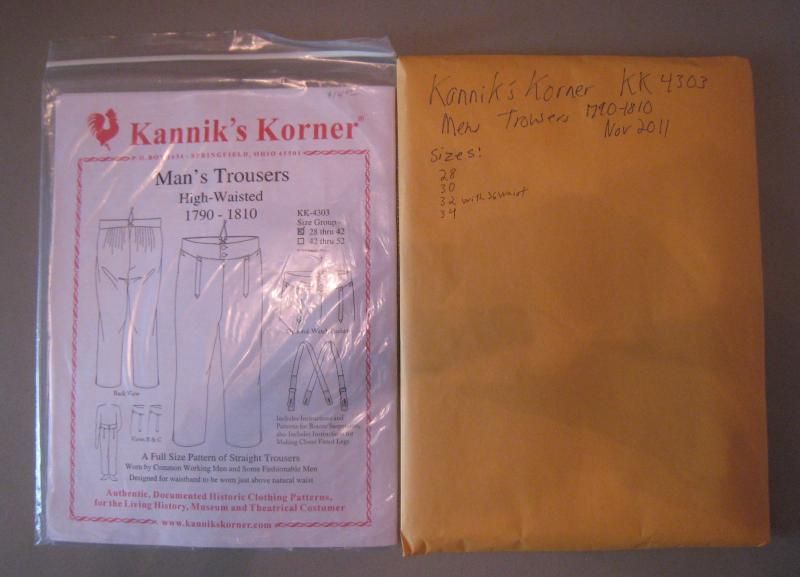
Notice on the front of the envelope I have written down the pattern name and number, the sizes and even the date that I made them. Inside there is a sheet with peoples measurements too.

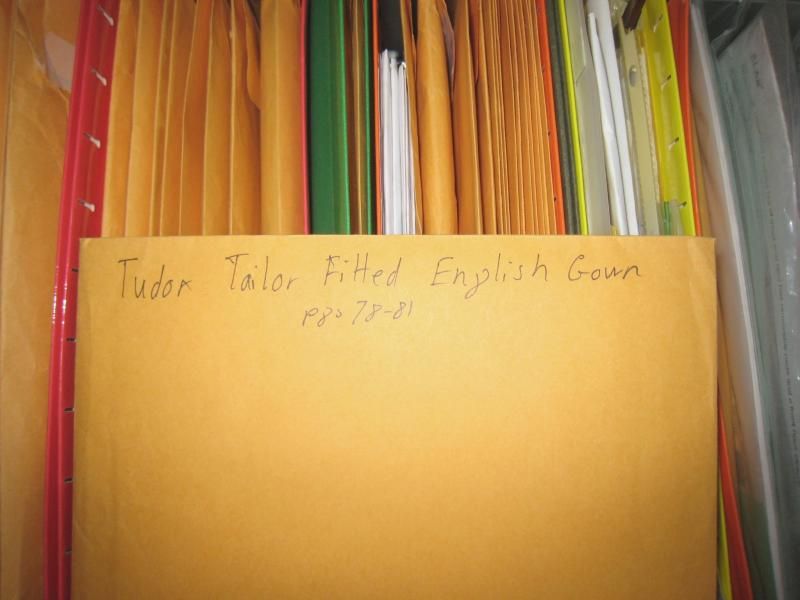
I also store patterns from books here.
Note that I wrote down the page numbers the pattern came off of as well as the book and pattern name.
For this pattern, I didn't have to do much alterations, so there isn't additional measurement info on the outside. (I am on the smaller side of normal, so the patterns fit rather well out of the book!)

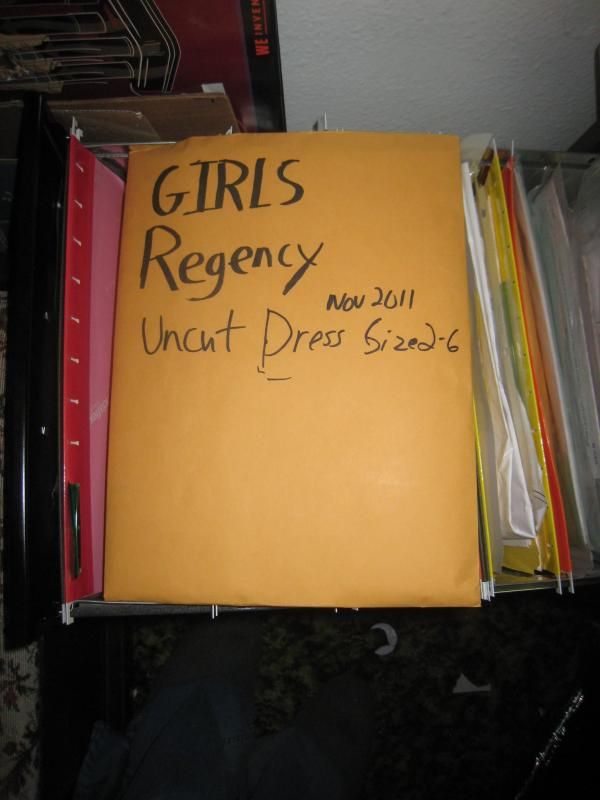
Then of course there are patterns that I make
Note that this copy of the pattern is labeled Uncut, and it is supposed to STAY that way, this is my paper copy in case I lose my digital data. It is also dated should I ever need to update the pattern, I won't accidentally grab the older version.

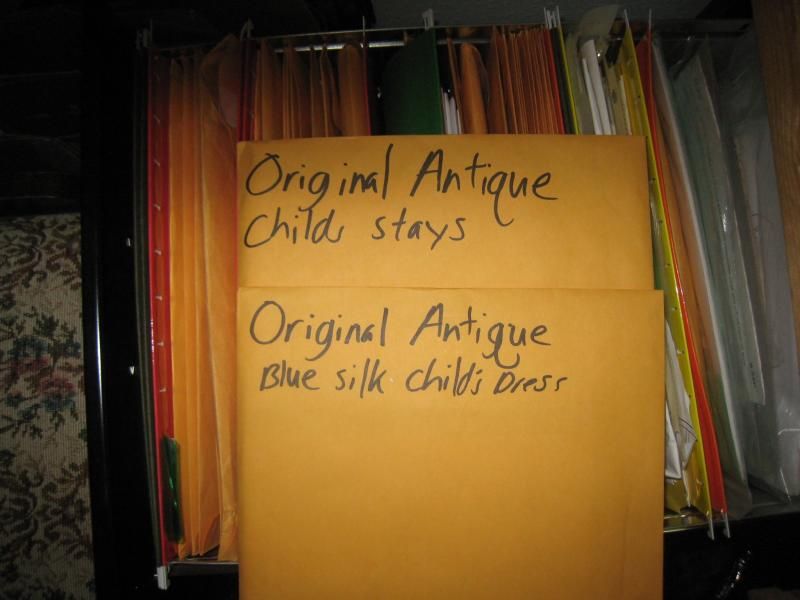
And of course I have patterns taken off of original garments that I plan on turning into patterns
These envelopes contain more than just the pattern though, they will contain other written information like the research I have done on them, photos, and receipts from purchase.

No, I haven't shared anything about those two patterns yet. ;)

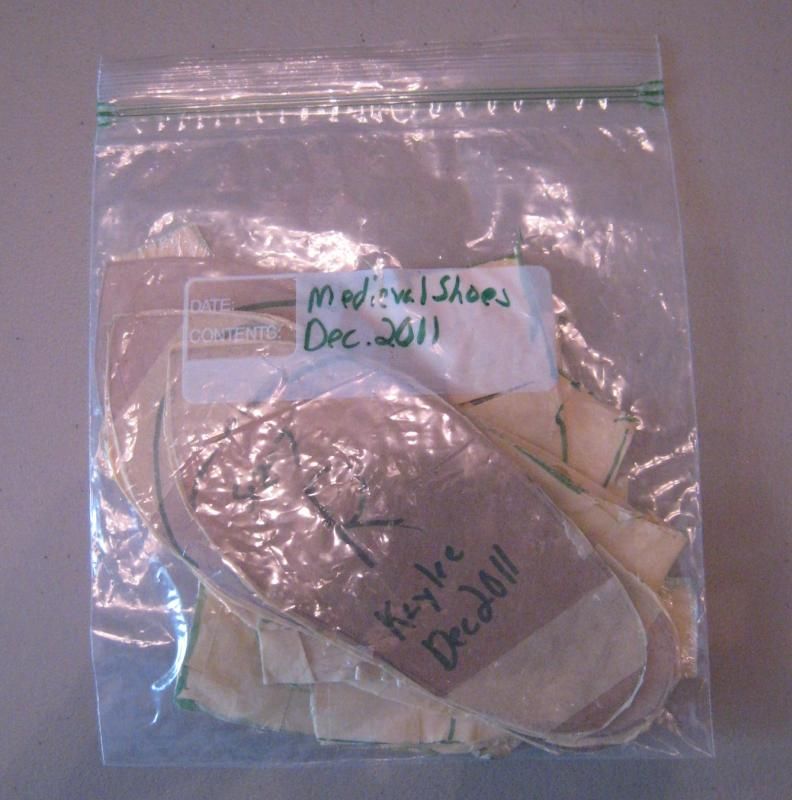
Of course not all my patterns are put away this neatly, here are some examples of the less neat patterns in my file cabinet.
I did paper tape shoe pattern making on my children. Note that the ziplock bag is titled and dated. Each pattern piece is labeled with the child's initials, date, shoe size and left or right.

I reuse envelopes, which means that many of the large envelopes you saw in my file drawer have my address on them! The above pattern is one I JUST made and haven't made up yet. I should date it, it is sitting right here on my desk, there dated!


Anyone recognize this pattern? You should, I have posted the finished product. This one may or may not end up in a paper envelope. I tend to use the plastic 9X12 zip bags for pattern storage as I am working on a project, and paper for when it is finished. But this pattern was not a full success.

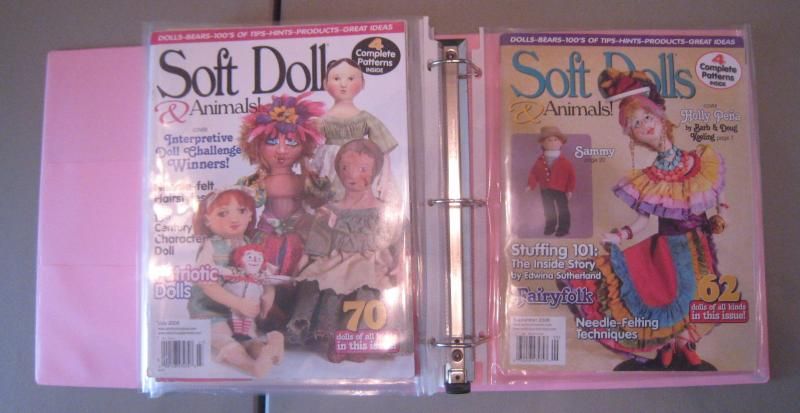
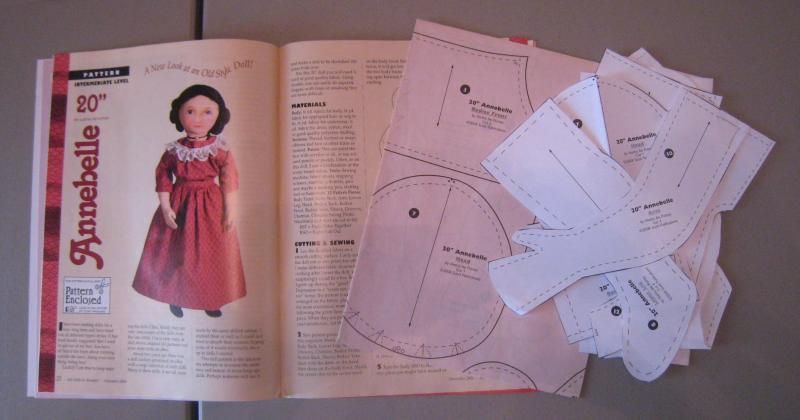
Then there is another category of pattern storage, I subscribe to Soft Dolls and Animals, which always has a pattern pull out in the magazine.
I used to store these in magazine holders, which work okay for me, but if you take the pattern insert out it could get separated should the magazine holder ever be knocked over.

Then I went to Binder Storage and used these holders for the magazines and regular sheet protectors for the patterns.
I am currently using Expandable sheet protectors to hold 2 magazines in each one WITH the patterns inside the magazines.

I would love to have a 3 ring sheet protector that had a zip top like these to try out for those loose pattern pieces.

Now there is one last pattern storage category I would like to go over, the In-Progress category.

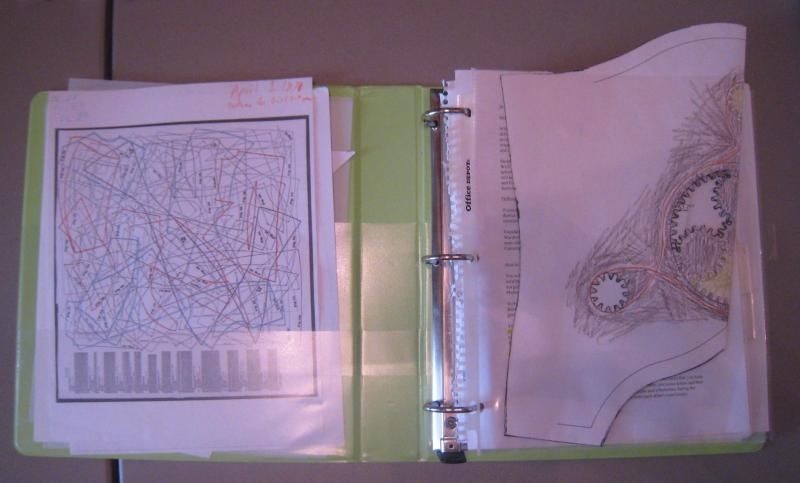
I have two ways of doing this, when it isa large project, like a garment, I like to put the patterns, and all other papers, like research and inspiration, measurement sheets, receipts, and design sketches into a binder.
This is when the sheet protectors get the most use, after the project is completed (and I am being a good organized girl) i will put the pattern into a proper envelope for long term storage.
In the mean time, it will look like this:
To reduce the need for several books to be open, I photo copy the needed pages and put them in my binder. You can tell that some pattern pieces will need to be folded down a bit before they go in the envelopes.

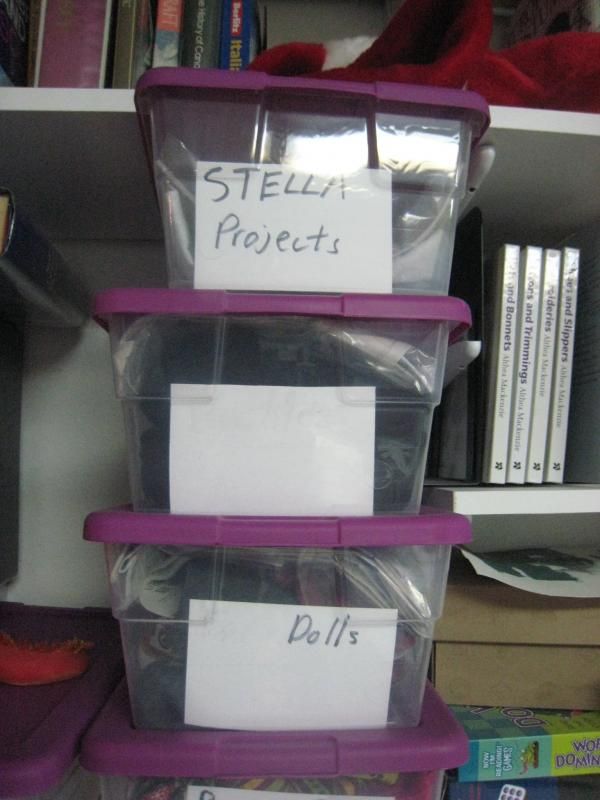
For little projects, the pattern will live with the materials in a bin.

I label the bins so that I know what is in them. I had to do some photo editing on this picture since some are future gifts. ;)

There is a problem with doing this though, you may never get back to that project! it has happened to me several times, I am hoping them being so blatantly obvious means that it doesn't happen again!

So there are some of the ways that *I* store my patterns, each has it's advantages and disadvantages and may not work for you.

Here are some last tips
  • Label EACH pattern piece! I had some loose craft pattern pieces on my desk that I have no clue what they were.
  • Label the envelope
  • Include dates and sizes
  • Group like patterns together, but maybe not in the same packaging
  • What ever works for you is fair game
How do YOU store your patterns? I would love to hear from you.


Tuesday, February 12, 2013

Thoughts on Pattern Envelope Backs

While the cover is what grabs our attention, the back of the envelope is an important part of the pattern, often giving us more "meaty" info after the cover image grab our attention.

Things you often find on the envelope back include:
Material list with suggested fabric types
Yardage amounts needed
Size charts
Written description of pattern.
Secondary illustrations

So for this post I pulled out patterns from my stash and took pictures of the envelope backs. The patterns are clothing and craft related, all in one post.

Once again I am only reviewing the content and layout of the pattern covers and not the actual patterns themselves.
Also some pattern makers have/may have/possibly will change the format of their pattern envelopes.

Lets start with the "Big Three" again, this time using Butterick 3721 as our example.
 Butterick is a "standard" size pattern envelope from the big three, which are roughly the size of a letter size paper folded in half.
The flap has the pattern number (twice) and size chart.

This pattern is called "Men's Historical Costume" and then described using style and fit descriptions.
Notions and fabrics are listed, and yardage amounts are on a chart.
Since this is a big pattern company it is also written in Spanish.
At the bottom of the envelop are the "flat" illustrations of the garments made with this pattern (coat and vest)

This is the format that most people are familiar with since they are readily available in all chain (and many independent) fabric stores.
Good points about this back
Bilingual (though that does effectively halve the amount of space that can be used.)
The flap is not hiding any data when it is folded out.
Issues I see with the back
"Historical costume" is not very descriptive about era, but that is what we normally get from the big three, they are not big on historical accuracy.
When Flap is folded in, the sizing chart is not visible.


Next up is Folkwear
This is pattern 211 Two Middies C 1980, my copy is an older one, so it may not be what Folkwear looks like today.
It is a large envelope (to hold letter size paper) and my flap is missing, so I can't tell you what info was there, if I had to guess I would say the pattern number.
On the left is the description, giving some historical data (1920's) and also saying that the middies are for both genders.A skirt pattern is also included, even though the pattern is tittled Two Middies.
Then there is a view of the back of the garments.
Last is the notions list
On the right is the sizing chart, which doesn't use measurement, but relies on standard sizing.
Then a yardage chart
Finished measurements are given and last is the Suggested Fabrics.

Good points about this back
Large illustrations of the back views 
The flap is not hiding any data when it is folded out.
History!

Issues I see with the back
No flat drawing of the front view.
Why is the suggested fabrics AFTER the yardage chart?

The one copy of an Ageless Patterns that I have was apparently sold in a plastic bag instead of paper envelope. What passes for the envelope cover is a piece of card-stock which serves as both front AND back covers.
It also serves as instructions.
Pattern number is at the upper left
A size chart is at the top,  then the pattern pieces are numbered.
Yardage is given as a range, since this is a multi-sized pattern. Seam allowance width is noted, then come the sewing instructions which reads more like the period description (I believe from Harpers Bazar?)


Good points about this back
Size chart is right there at the top.
Pattern pieces are listed, named and numbered.
Historical Description (though no source is cited)
Suggested fabrics is given. (drilling and a modern equivalent)

Issues I see with the back
You can't see it in the plastic bag with the pattern behind the "cover"
Is this is all the instructions there is? (mine is a used copy)

Kannik's Korner
I have a few of these in my collection, photographed is KK4303 Men's Trousers 1790-1810 which was sold in a plastic bag. I have an older pattern of theirs that was sold as a large paper envelope, the backside of that envelope was blank! (Remember what I said about pattern makers changing formats)

The pattern front is actually half of a Tabloid sheet of paper 11X17" and forms their instructions, so this isn't really a back cover, but it is what you see on the back, along with the pattern pieces.

This is the start of the Historical Documentation.

Good points about this back
Title, date, pattern number are right up top where they are not buried by the tissue pattern in the bag.

Issues I see with the back
No size chart, yardage chart, or other info that one would expect on the envelope back. In fact that info is a few pages in, after all the lovely historical information.

Laughing Moon
This pattern #109 is in the same envelope size as the Big Three.
On the flap is the size chart.
On the left is the title followed by the flat illustration of the garments included in this pattern then a description with some historical info which leads right into suggested materials and notions.
On the right is the yardage chart follwed by some more notions, last is the pattern makers info.

Good points about this back
Flats on the front and back view of the included patterns
Some historical info (more with the instructions)
Issues I see with the back
When Flap is folded in, the sizing chart is not visible.  When the flap is out, other information is blocked.
The way the historical info runs into the suggested fabrics could lead to some confusion.

 Rocking Horse Farm
This is #153 Waistcoat 1790-1820
Letter size paper in the horizontal format (Cover is in the more usual portrait orientation.) sold in plastic bag.
This pattern back is a bit unusual in that it tells you how many of each pattern piece to cut and seam allowance, those are normally found in the instructions.(The instructions are just the backside of this page.)
Good points about this back
Illustration (same as on front)
Some historical info (more with the instructions)
Yardage, notions and suggested materials are listed.

Issues I see with the back
No size chart (it is on the front)

J. P. Ryan
This is the waistcoat pattern, and a used copy, the pattern is not numbered, J. P. Ryan may have given it a number now. Letter size paper sold in a plastic bag.
This pattern was sold i n single sizes and the size in this pattern was highlighted.
A bit of historical description and then a size chart, followed by fabric requirements and notions. Last is suggested fabrics.

Good points about this back
Large font is easy to read.
Some historical info
Yardage, notions and suggested materials are listed.
Issues I see with the back
I would have loved to have seen a back view of the garments as none was on the cover front.

Truly Victorian
This is TV456 1856 Gathered Dress as is says right at the top on the pattern back. The pattern back is Letter size paper sold in a plastic bag. The cover is Legal sized and folds over the bottom to cover the back.
Underneath the fold over flap is the pattern makers info, so no important info is really hidden.
Starts off with historical info, then yardage requirements and notions, last is their unique sizing chart.


Good points about this back
Large font is easy to read.
Some historical info
Yardage, notions and suggested materials are listed.
Their sizing chart is LOVELY
The fold over flap is a unique feature to TV patterns

Issues I see with the back
A small illustration would have been a nice addition.

Now to will leave the world of costume patterns and take a look at the craft patterns

Smallworks
Dragon pattern
Printed on letter sized paper
Tools and Materials list on the left
Tips  are included

Good points about this back
Large font is easy to read.
tips for making your dragon unique

Issues I see with the back
No yardage requirements listed (in instructions)


Marilyn Halcomb is an Australian designer whose patterns may be purchased at Dollmakers Journey and other places.
Since this is of Australian publication the paper size is different from American Leter, it is closer to 8 1/4 X 11 3/4" this pattern was sold folded in half, so that one sheet formed the front and back the back half contains materials list.

Good points about this back
Materials list and legal disclaimers

Issues I see with the back
Finished size of dragon is not mentioned (not on front either)

Elan patterns are available at SewSassy and other bra making suppliers.
This is B540, I am looking at.
The pattern cover front and back are printed on one letter sized sheet, which is folded in half to make the front and back.
It is printed in a different orientation from the front, so that you must rotate to read the back when you flip it over.
Topis the pattern maker in the upper left, the upper right has the pattern number.
Next is the pattern description, then the materials list and yardage requirements.
Last is pattern makers contact info and legal disclaimers.

Good points about this back
Materials list, yardage amounts and legal disclaimers. pretty much everything one would want.

Issues I see with the back
No secondary images

Silver Lining Originals is a quilt pattern company Published by Make it Easy Sewing & Crafts, A Quilt Woman.com Company
This is the Lap-Lop Bunnies, a paper pieced quilt pattern
The pattern cover front and back are printed on one letter sized sheet, which is folded in half to make the front and back, inside of a plastic bag.
Top is a description, next come fabric yardages, since this is a quilt pattern, the use of quilting cottons is assumed, so the only fabric suggestions is in color.
Lower left is the publishers information, lower right is the designers information, then a barcode.
Copyright is on the bottom


Good points about this back
Everything one could expect and a barcode!

Issues I see with the back 
None for a quilt patten.

Needlesongs by Carol Bruce is a quilt pattern company
This is the Dream Castles Fusible Applique pattern that I am looking at.
The pattern back is half of a letter sized sheet in a plastic bag.
Starts off with pattern title, then description, which includes size. (Which was not on front.)
Materials list and yardages, stating "100% cotton, prewashed and ironed."
Copyright and contact information is on the bottom.

Good points about this back
Everything one could expect, well laid out.

Issues I see with the back 
None for a quilt pattern


Judi's Dolls by Judi Ward
This time I am looking at 9-12 Month Size Baby.
The pattern cover front and back are printed on one legal sized sheet, which is folded in half to make the front and back. The front has a color photo and the pattern is copyrighted 1978.

Starts off with the Materials list, which includes yardages and then runs into the description

Good points about this back
Materials list and yardage is there as is a description of the pattern. (sized to fit real baby clothes)

Issues I see with the back 
There isn't a space between the materials list and the description, it all flows together down the page.

In conclusion

And there we have it, I have reviewed costume, and craft patterns. I think I have a better idea of what is important to me, and how much format means to a buyer.

In the end, What goes on the pattern back is what the maker feels is important, What do you as a purchaser want to see on the back?