I am not making this just because you asked,
I am not helping you with this project just because you are my friend,
Nor will I help you in the hope that you will help me, or other karma,
I do not drop what ever I am doing, to help you look for that reference for your research just because you need it,
I do not enter challenges just for the prize,
I will not write about that topic just because you want to read it,
I am not doing this just because you asked.
I do it because I want to.
I do it for the Challenge.
I do it because I see it helping me in some small way.
I do it for the benefits that may come later.
I do it because it inspires me.
This post brought to you by my children's birthday gifts I am working on.
Embroidering eyes
Fabric is a pink zebra polar fleece, I drew the eyes on white cotton, colored them in with fabric markers (didn't have purple, so I used red) and then started stitching it down, cutting around 1/8" and turning under as I worked.
Showing posts with label embroidery. Show all posts
Thursday, April 11, 2013
Tuesday, September 25, 2012
A Handmade Gift
When money is tight but the stash is large.
When a Special even is coming and requires a special something.
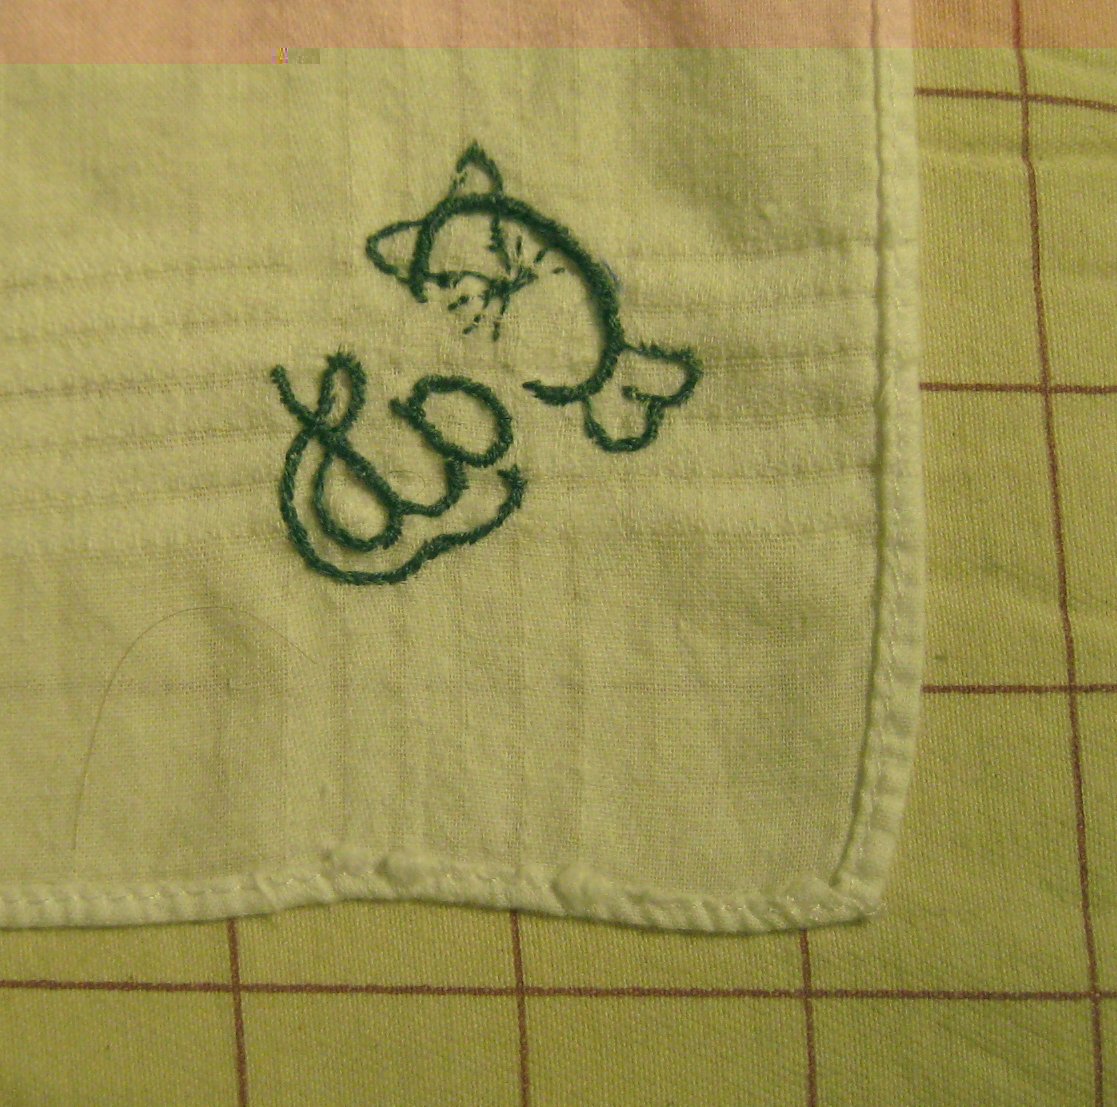
My husband had a birthday recently and I was at a loss on what to give him. He is a low key kind of guy so he wouldn't have been bummed if I didn't give him anything, but I couldn't do that. I knew of several things that he wants, and several that he needs, but they were all more than I was wanting to spend. A conversation between friends online lead me down the path of how old fashioned he is and I had the brilliant idea of embroidering one of the cloth handkerchiefs that he uses. It would require no money just a design and some time!
I decided I wanted to use an actual Victorian pattern and headed over to De Gracieuse to search through the embroidery patterns. I didn't find Letters of his initials that I liked, many were too flowery, and honestly I am not fond of the way his initials look together. then I found it!
October 1st, 1867, Issue 20
(if the link doesn't work, search for "Gracieuse. Geïllustreerde Aglaja, 1867, aflevering 20, pagina 172/3"
My husband's nickname is Cat, so I left off the O in Cato. I cropped the image and printed it out at the size my printer wanted to and copied it onto the hanky.
I managed to embroider it, in the same room as my husband (since he was home all this time) and he didn't notice! I was done with it quickly enough that I decided to do a second one. This one I had fun with making my own design.
I think he liked the second one better, but he did appear to like both and was surprised that I had made them right under his nose!
I am not very good at embroidery so I can't tell you much about the stitches other than I used satin and split stitches (I think, I could be very wrong.) I also did not knot the end of the threads, but wove them under the back of the embroidery. I thought this would give a better look to the backsides.
For the sake of honesty, here are the backsides. and I apologize for the poor lighting, I had to be sneaky in the early morning on his birthday to get these pics.
Friday, August 17, 2012
Brave are the Artists
Today I finished off the last of Merida's clothes and carefully packed her in a box. The children said their goodbyes, especially my daughter.
I had blogged about her hand embroidered face a while back
Her hair is quite red and full, the yarn I used is Homespun and I have used it in other colorways in the past. This time I didn't cut it in to strands but left it looped at the bottom, this means it will hopefully not all ravel off her head!
Her arms are jointed at the shoulder, her legs at the hip.
In the end she has a nicely rounded wardrobe of 4 dresses, a cloak, undergarments and a blanket.
Click the cut to see more on ALL the clothes this little girl has.
Monday, July 23, 2012
Embroidering eyes
I recently started a couple of soft projects for my children.
One is going to be a doll based on Merida from Pixar's Brave. I hope to actually make more than one doll, and even hopefull a set of Triplets. The pattern is my own that I have designed and if it works out well, you may find it in my etsy shop soon.
The other is a Pony Pattern by VooDoo Tiki on Deviant Art
I decided to try my hand at embroidering these faces. The doll is finished and now ready to be assembled into a head. The pony will need it's mouth stitched after the face is seamed together.
The doll's nose is stuffed and has a scarp on the back to hold that stuffing in place. I hope it is still dimensional when the whole head is stuffed!
I am pleased with my attempts, having never embroidered eyes like this before, and I didn't take a look at tutorials until after I had stated. I will be trying different techniques on the next dolls and ponies.(yes I will be making 3 ponies) I used plain cotton for all of these projects.
The Merida Doll you see here can be seen finished here
The Pony is Finished Here
Subscribe to:
Posts (Atom)