Showing posts with label corset. Show all posts

Sunday, April 7, 2013

Antique Shopping

Saturday I went to a local Antique store for their spring event. a trunk of 100 year old clothes was being displayed and for sale.

 It was my day off, after spending all week with the children on spring break, Mama needed a break, so I went out by my self to antique shopping.

I wasn't expecting to purchase anything, but before I went, I asked my husband what  my "allowance" was, as money is tight with us. I of course knew that I would spend more on something if I really wanted it, but I know what I want and what I was looking for. (McDowel Pattern Drafting set, Doll Corset, Corsets, Victorian Magazines with patterns, Victorian Patterns.)


Some of the items were being worn by young slender models, others still in the trunk.
I dug through the trunk and looked at everything, at the bottom I found this mid 19th century corslet.
It is black silk, lacing at both front and back, the back retains it original spiral lacing. the front baleen bone is much broken and coming out of the broken silk. the beaded trim at the top edge is a bit loose and coming off in some places. The interior is a brown polished cotton?

In another part of the store I spotted this drafting set, which was too shiny for me to pass up. You see my husband is a Draftsman (which is where I learned CAD) and has a few of these vintage sets, though the case of this one is probably in the best condition of all of them!

I browsed through the other antique stores in the area, looking for an item that had been mentioned to me at the first store. Well I found it, and yes it was something I wanted.

Behold my sexy new underwear!
I think I will save more on this for later, I am in the research mode right now! But I will tell you it is from about 1890's to 1910's

All this for about $60, which happened to be the number my husband told me. when I got home with my treasures he said "you could have spent more" I told him I knew, but that I was only interested in purchasing things I would use.

The drafting set was much ohhed and ahhed over for it's shininess and was deemed to have been worth the price of all my purchases. (men, they like shiny tools) I particularly am looking forward to using it to make larger circles!

 The drafting set has been photographed on the drafting table, and the ruler you see is attached to the drafting arm.
I am looking forward to taking patterns off my new clothes, and yes I do want to make the union suit for next winter, though I doubt I will be able to find the right fabric. (It's a tube made naturally narrower at the waist.) and I need to do a bit more research to date these items more accurately. Oh and clean the union suit a bit too....

Tuesday, February 5, 2013

Musings on Sewing Pattern Envelope Cover Front

I have been thinking of Packaging lately, maybe it is the fact that Christmas is coming up and I enjoy wrapping gifts.

Pattern covers should fulfill a couple of requirements:
1. Clearly show WHAT the pattern is
2. Be eye-catching

There are of course several key little things like
  • Sizes
  • Description
  • Skill level
  • Copyright
  • Pattern name/ number
  • Pattern Designer/Publisher
There is also a whole other list of things often found on the BACK of the envelop, that I am not going to talk about in this post. Partly because, when selling e-patterns, there is no envelope back!

I decided to take a look at Historical  Pattern Companies and see who they laid out the covers of their patterns.
Before I go any further I want to say I am looking at the COVERS only, and these opinions are mine and have no relation to how well the instructions or pattern pieces actually are.  I have used some of these companies patters, and never seen others at all. I did not pull up every Pattern company out there, just thous that I thought were examples of different styles, so  not all the costume pattern companies are represented in this discussion.

Let's start with Simplicity as our representative of the "Big Three" which actually contains Burda, Butterick, McCalls, Simplicity, and Vogue. these patterns are carried by many chain and independant stores in America and internationally.


What's the first thing we see? The color photo showing both the front and the back view of the garment. (I purposefully picked a corset pattern since I will be doing corset patterns)
We also see SIMPLICITY and the pattern number across the top.
Down at the bottom we see the designer's name Designs by Kay
As well as the barcode and web address for simplicity patterns.

Does it catch our eye? Yes it has a corsets, and corsets catch my eye.
Do we know who made it? Yes Simplicity is hard to miss, but Kay is small, and could be hard to see if the image is a thumbnail in a catalog or on the internet.
Do we have a description? No, that is all on the back, per Simplicity.
Do we know what is included in this pattern? We can assume the corset is, as it is prominently featured, but are the other undergarment? (Turning the pattern over would tell us yes.)
Do we know the size? Actually yes, it would be on the front of this pattern but has been photoshoped out, it is also on the back.
Pattern number is right on top, so it is easy to find it in the pattern drawers.
Skill level? Not really, Simplicity only labels the "Easy" ones.
Copyright is on the back.

Good points about this cover
Large color photo of garment on real human. Pattern number is up top as is sizes. this makes it easy to find the right one in the pattern drawers.

Issues I see with the pattern cover
No Description: the historical costumer would like to know the rough time period of the corset  Also it isn't clear from the pattern cover that the undergarments, not just the corset, are included in the pattern.
In a thumbnail the light colored corset blends into the other white undergarments and background.

Next up is Laughing Moon  Their corset pattern Silverado/ Dore was the main staple corset pattern for a number of years, many have used it and loved it.

We see the color picture of the corsets on the dress form first, then we see the text above it which gives us most of the information

Laughing moon uses a logo with their name on their patterns.
The pattern number is on top, just bellow it is the pattern name and description, followed by sizes and skill level.

What is the pattern? Corset and under garments as pictured and described.
Is it eye catching? The red corset sure is.

The size including cup size is on front, with a detailed size chart on the back.
Pattern number is right on top, so it is easy to find it in the pattern drawers.
Copyright is on the back.

Good points about this cover
Large color photo of garment on Dress From. Pattern number is up top as is sizes. this makes it easy to find the right one in the pattern drawers.
Clearly states that the pattern includes the undergarments.

Issues I see with the pattern cover
Description:is a bit wordy, also a bit overreaching that these 2 corset styles would span 1837 to 1899 any serious costumer knows that there are changes that happen in those 60 years! The patterns could be modified to fit those years, but right out of the envelope they will not.
In a thumbnail the light colored corset blends into the other white undergarments and background.
 

Truly Victorian is a pattern company Specializing in the Victorian are and many costumers have a lot of respect for their patterns.


This pattern features an illustration rather than a photo, this reads clear, and cuts down on printing costs. Since no other garments are included in the illustration, a buyer would not think that they were included in the pattern.

Company, Pattern name (note it is TV110 so that when it is carried by another pattern seller, the identifying number is right there)
The corset is dated 1880's right on the pattern cover.
All sizes are included, but the size chart is on the back.
Last is copyright at the bottom.

Good points about this cover
Large clear reading illustration. Pattern number is up top Corset is dated

Issues I see with the pattern cover
Sizes are not on cover

Reconstructing History is a prolific pattern company covering a very wide time period.
This cover has a colored illustration. RH does all their pattern colors as illustrations, the colored garments are what the pattern is for, so while a whole outfit may be drawn, only the garment that is colored in the illustration is in the envelope. A very interesting way to do a cover illustration.

Good points about this cover
Large clear reading illustration. Pattern number is up top Corset is dated

Issues I see with the pattern cover
Sizes are not on cover

Ageless Patterns reprints Victorian and later period patterns that were published in magazines. The reputation as a company is varied. Some love them, some actively do not! Luckily we are only looking at the cover today so none of those arguments will come to play.

The cover is illustrated with the original pattern illustration from the period source. Sometimes these illustrations were cut off by another garment and Ageless has removed the other garment so the illustration can look a little strange.

Good points about this cover
Large clear reading illustration. Pattern number is up top Corset is dated.Size is listed on cover

Issues I see with the pattern cover
Some of Ageless covers have the original images cropped weirdly since there was another garment in front in the original period image.


Mantua Maker is another historical costume pattern company
Mantua Maker is another pattern company that uses illustrations instead of photos for their pattern cover.
In this example we can see there are a few style variations in this pattern by the"flats" shown around the main illustration. The size chart is right there, as is the date.

Good points about this cover
Illustration shows variations. Pattern number is there Corset is dated.Size is listed on cover

Issues I see with the pattern cover
The pattern number is not op top and rather small.
The size chart being on top is a bit distracting.


Atelier Sylphe Drafts Corset patterns for Originals in their Private Collection.

This is the image used in online shops to sell the pattern, not really a pattern cover so to say.


Good points about this cover
Illustration shows seam lines clearly, photo shows the original corset very well.

Issues I see with the pattern cover
This isn't really a pattern cover, so there is no size info on the image, but everything is there in the listing.

King & Company is a newer corset pattern company

This is the cover for their paper pattern. The cover is a nice sepia illustration of both the front and back of the corset. This pattern is Named rather than numbered.

Good points about this cover
Illustration shows seam lines clearly, both front and back view is shown.

Issues I see with the pattern cover
There is no size info on the image, but everything is there in the listing. The pattern is Named rather than numbers, which could lead to issues if it was every carried and sold by another company.


Harlots and Angels is a newer pattern comapny

This is the cover for their paper pattern. The cover has a nice boarder and photos of both the front and back of the corset. This pattern is Named rather than numbered.

Good points about this cover
Multiple photo angles, both front and back view is shown. Sizes are shown on pattern cover. Link at bottom

Issues I see with the pattern cover
The pattern is Named rather than numbers, which could lead to issues if it was every carried and sold by another company.
some might find the boarder pattern fussy.


So in the end....

Monday, February 4, 2013

Only one Corset can win first place.

So in Second pace we have….

1810 Corset en X
24% of votes went to the wrap around stays/corset
I have started grading the pattern,  which is the most challenging aspect of the pattern making process.

A comment on my blog worth sharing:
“I voted skeleton, mostly cos I have Dawn Luckham's pattern (available here) and can figure out the corset en x. If I didn't I'd totes vote for corset en x, as I have bought every available regency stays pattern. (a wee bit obsessed & wanting to support the production of them)”

I want to go on record thanking Dawn for first sharing an image and then creating her pattern. I later found more info and created mine. I shared all that I had discovered with her and you may very well see her make a new pattern, but that doesn’t mean I won't go ahead with my vision of it.


Which Means….
The Skeleton Corsets WON!

Anyone surprised that the Skeleton Corsets won with 51% of the votes?

No?

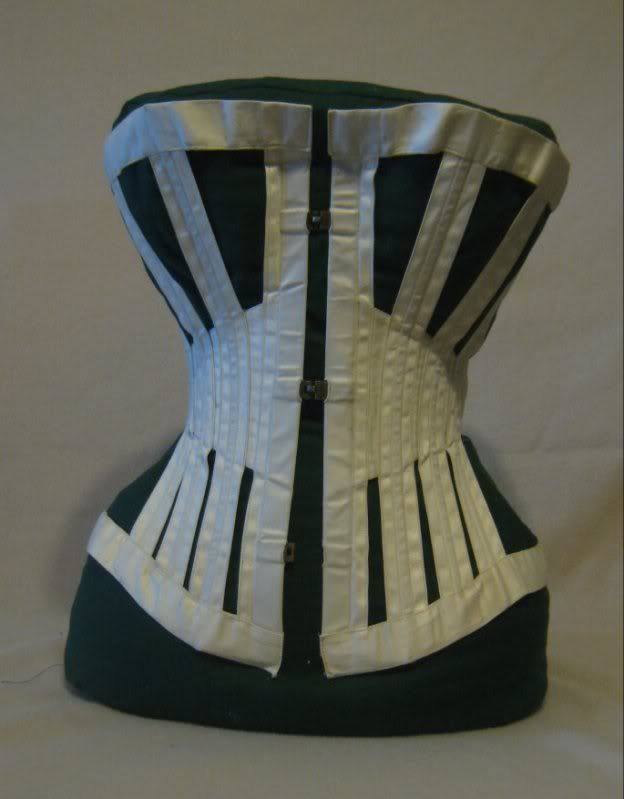
Oh well I guess that is where I am making my name, in the Skeleton Corset research. They are such an unusual style of corset and there are not many of them surviving. I am lucky to have the 2 that I have, though I really wish I had snagged the other one as well! (I saved the pictures from the ebay auction, but per the sellers request, I can not share them)

In the early part of the voting, Dragonlet was actually in the lead, then I went and asked for votes on the Corsetmakers LiveJournal Community and Dragonlet ended up in third place.

So again the breakdown of which pattern got what of the 37 votes cast.
Skeleton Corsets 19/37
1810 Corset en X 9/37
Dragonlet 6/37
Regency Girl 2/37
Medieval Child 1/37

Wednesday, January 23, 2013

One week left on the poll

There is just 8 days left to vote on the poll.
For a while there, it was a 3 way tie, and not in a way I expected! then I posted to some Live Journal Communities and that all changed.
As of this posting, there have been 20 votes.

Not much of a sample size, if you ask me.

So I ask you again to Share this post and comment if you feel like it. Why did you vote for that one? Tell me what your second choice was. Tell me which one you are least interested in and why.

On the Left is one of my Antique Skeleton Corsets. I own 2 and they are so different that the published pattern will include both styles.

On the Right is my 1810 Corset en X, I entered it into Foundations Revealed's 2012 contest and placed. You can read more on it here. The pattern will be multi sized and have at least 2 variations.

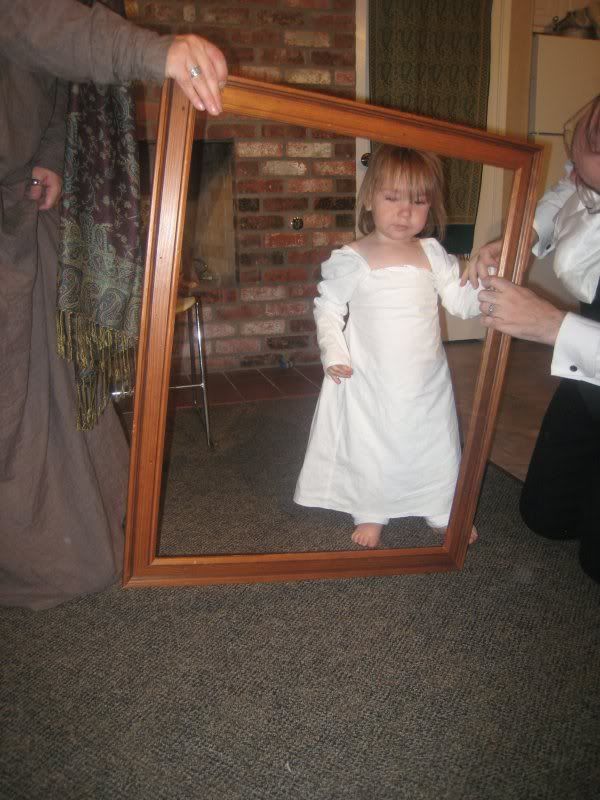
On the Left is my Regency Era Girls dress, it has a flat fron, like the inspirational period dresses I talked about here, and I hope to round out the dress into a complete outfit.

On the Right is my Medieval Child's Era Gown. it comes in both boys and girls styles. I really need to share more about this garment, I just need to dig up more of the pictures. Here is some of the inspiration.

Last of course is my Dragon Pattern. 26" long, wired and magnificent. This pattern is not a toy for children, but I have other ones that are suitable for children.
Thanks to all those who voted, and thanks to those who comment, thanks also if you shared this link!

Tuesday, January 15, 2013

Introducing a POLL!

In my attempts to find the balance in my life, I have decided I need a good clear goal and a path to achieving it. I also need to be held accountable to someone. I think what I need is to do a month end post on the current project pattern, so which pattern should be first?

So here is the Poll, which you should be able to see at the upper left of this page. If you can’t see it, comment!

Which pattern should I FOCUS on first? It may not end up being the first one released, but it will be the one I focus on and blog about creating. All will probably become patterns in time, so don't fret if your first choice is not the one that comes out on top.

The Poll is now CLOSED you may see the results here 

Feel free to share this post, the wider audience the more variety of votes, the clearer the picture will be for me.

The Skeleton Corsets
Needs contact Met again, and the two patterns are SO different, it is more like 2 different corsets, not one in 2 sizes.


The 1810 Corset en X

Needs museum contacts, and grading, then testing. Read more here.

Regency girls outfit.
I have the basic pattern and instructions for the dress, I need to add the under and outer layers.
Read more about the inspiration here

Childs “Medieval” outfit
Refinement of pattern and instructions, additional layers added then off to testing

Dragon pattern.
CAD the pattern and make a new one, photos and testing.

Once again, the Poll should be in the upper left of my blog, and is open until January 31st, 2013. if for some reason you can not vote in the poll, comment! I will tally them all up at the end and anounce the scores on February 2nd.

Please SHARE this post to anyone you think would have an interest in these future patterns.

The Poll is now CLOSED you may see the results here

Sunday, December 23, 2012

SPP 2009 Sewing the Corset


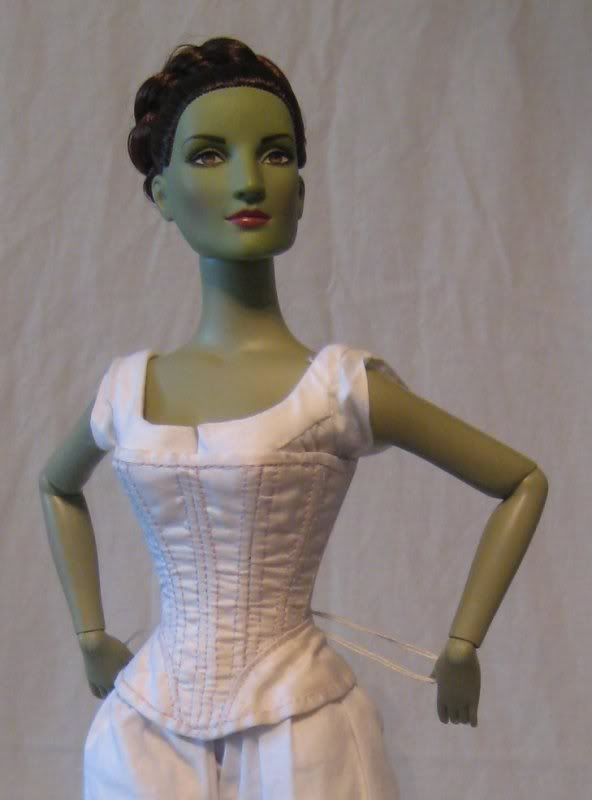
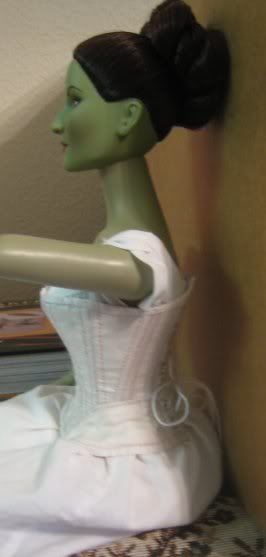
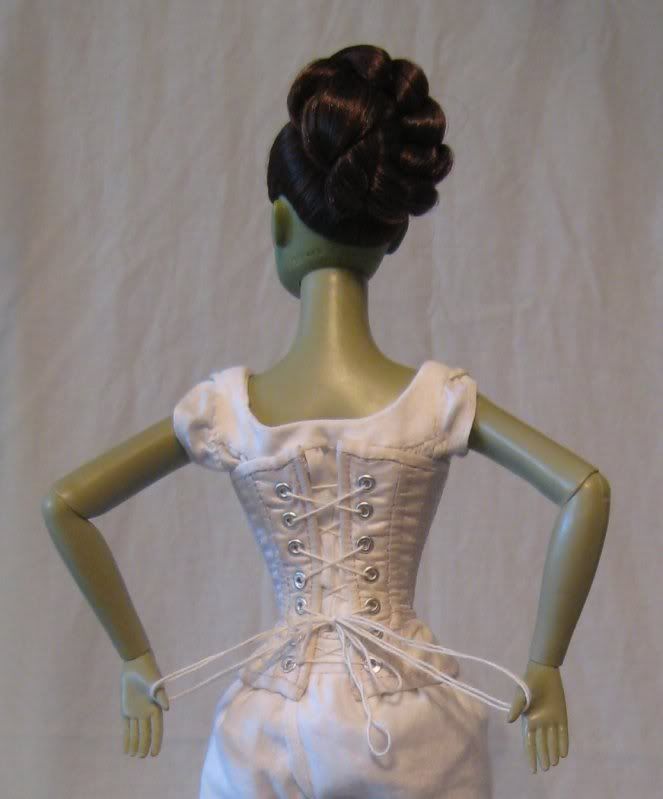
Sewing a diminutive properly boned doll corset is one of my favorite things. I have done it on several occasions. I shared with you the Mini Teal Corset, which was my first attempt at a busk. I have other doll corsets that I will share with you later too. But this post is about sewing Elphaba's corset.
I described the process I used to make the pattern in this post.


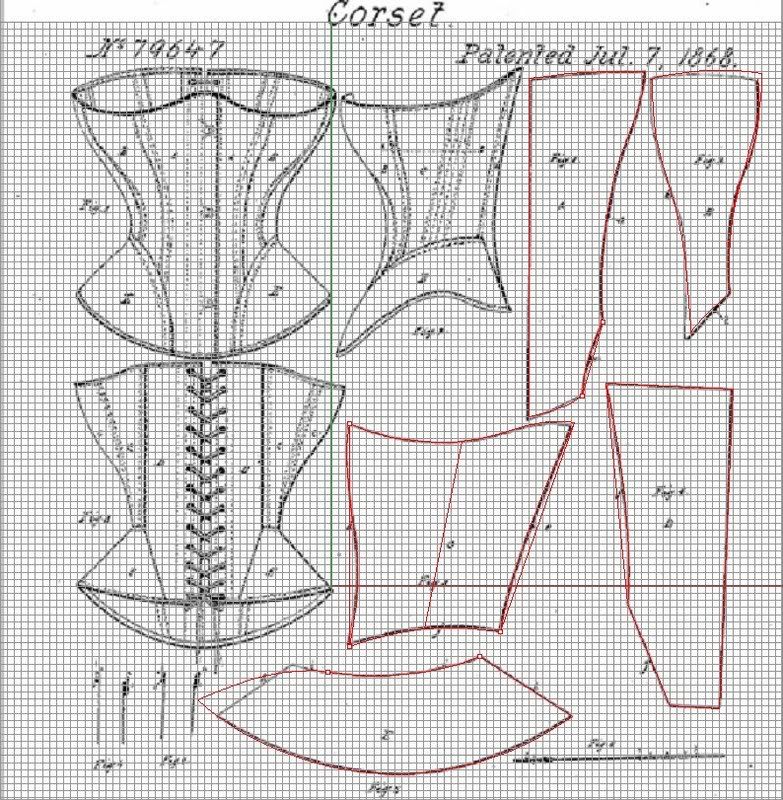
I used Lavina Foy's Patent 79647 Issued July 7th, 1868. It is a bit late. (One must remember that the patent was applied for many months, possibly even years before it was issued.) I chose this pattern because I did not want to do gussets in this size, and just straight panels are a bit boring. The actuall sewing follows my standard for doll corsets. I cut out the fitted pattern with no seam allowance, lay it on the cotton that I use as my strength layer and trace around the pattern piece.
 The CF and CB are on the fold. I then baste my fashion layer to this just on the outside of my traced line. My fashion layer was a thin white silk in this case. 
The CF is cut on the fold because I have not come up with a good way to make a busk for dolls. My last attempt in the Mini Teal Corset was for a larger corset and while it did function it was not pretty. Also most of the doll corsets I have seen with busks are larger and from a later date (1880's?)
The CB is cut on the fold because a seam at the back would add more bulk, and it gets really narrow when you need to put in eyelets.

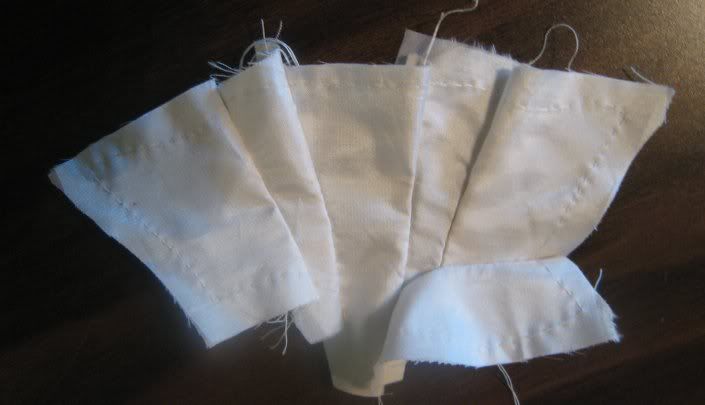
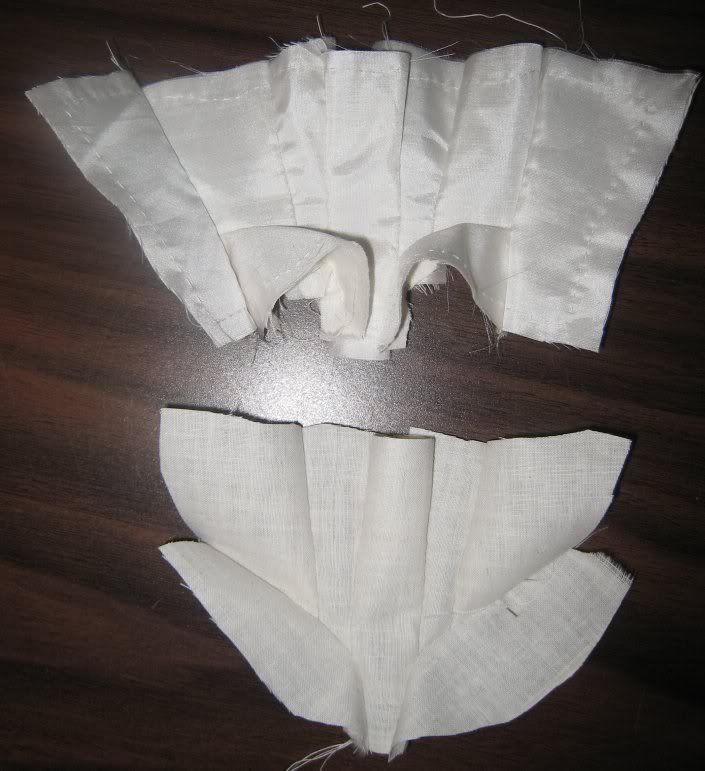
This image shows the side pieces of cotton flat lined to silk exterior as they are being basted together before assembly.


After I have the layers all basted together, I cut them out leaving 1/4" all around them, then I sew the pieces together. For this corset, the fronts are sewn together, then the side is added, the the hip gore is sewn in and last is the back panel.

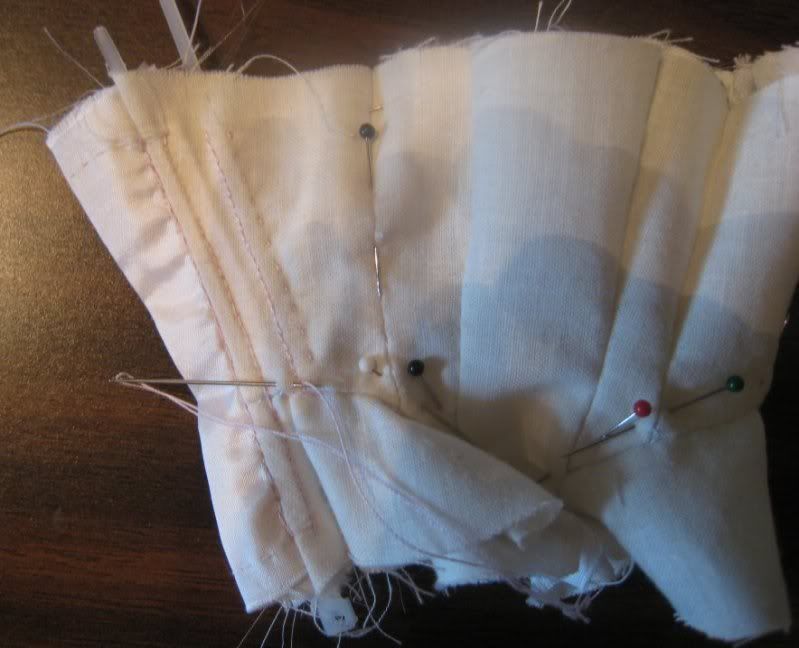
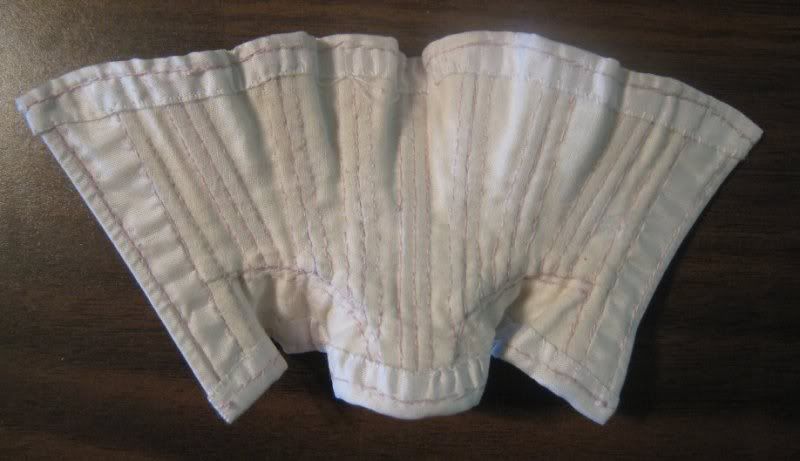
The image shows the corset with one hip gore sewn in, as seen from the inside.
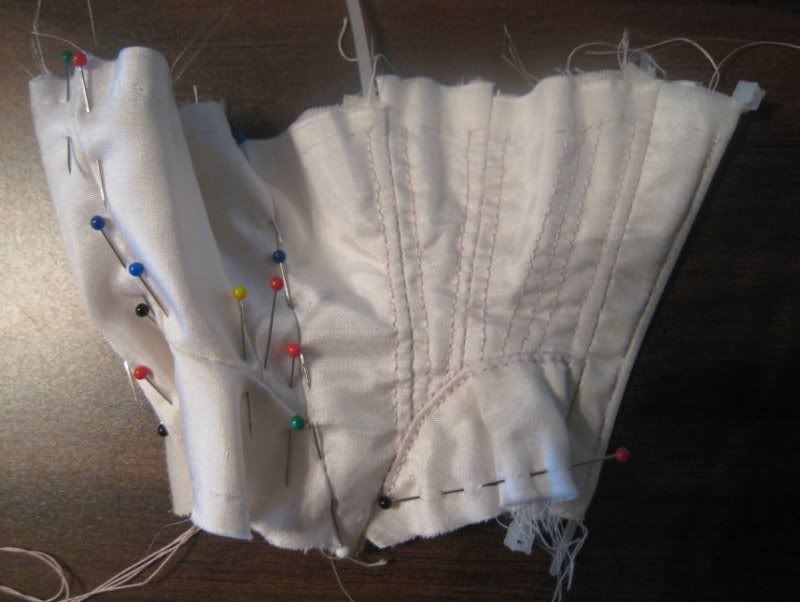
The corset at the same stage as seen from the outside


Then add the lining in the sandwich style, press seam allowances open so bulk is even on both sides, and stitch down the seam to hold all layers together.

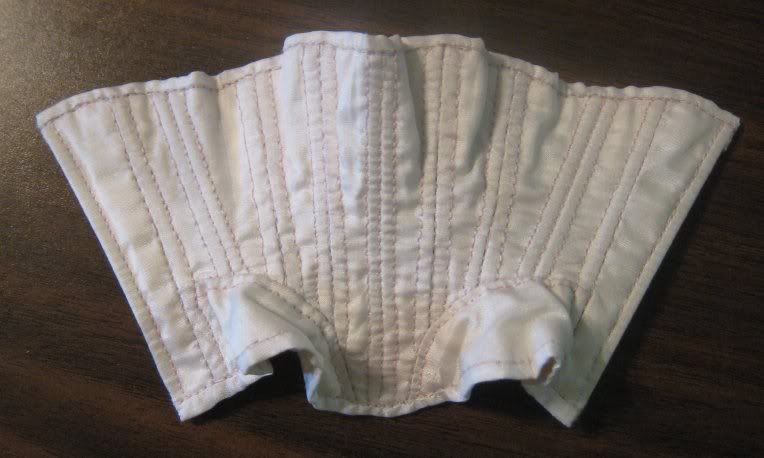
This image shows the exterior silk corset on top and the plain cotton lining below. the lining does not have the back panel since it was cut on the fold, which is why they are not identical.

Then stitch the boning channels, for which I used pink silk thread to stitch them using a back stitch. I used 4" cable ties for this corset, 14 of them were enough to bone all 18 channels since the ones on the side do not go into the hip gore I got two bones from one cable tie in those instances.

Sewing boning channels, as seen from the inside.


Sewing the channels as seen from the outside

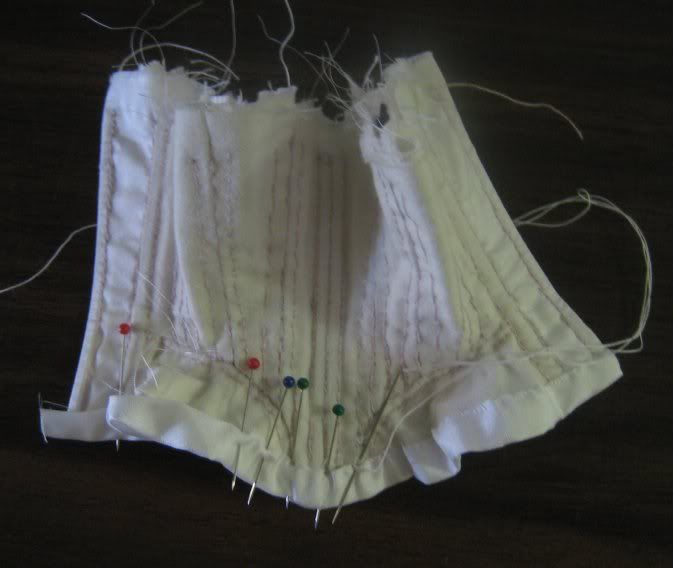
Then I bound it in a strip of the silk, I often actually use silk ribbon for this application, but couldn't find mine. This is another reason why I used a silk fashion layer, it is thin, to use cotton as the binding would have added a lot of bulk. The binding is cut from straight of grain. when finished it is 1/8" on the outside but much larger on the inside, this was for my ease of finishing and it actually makes it a bit more stable.


Sewing the binding down on the inside

The finished binding from the outside.

The finished binding from the inside

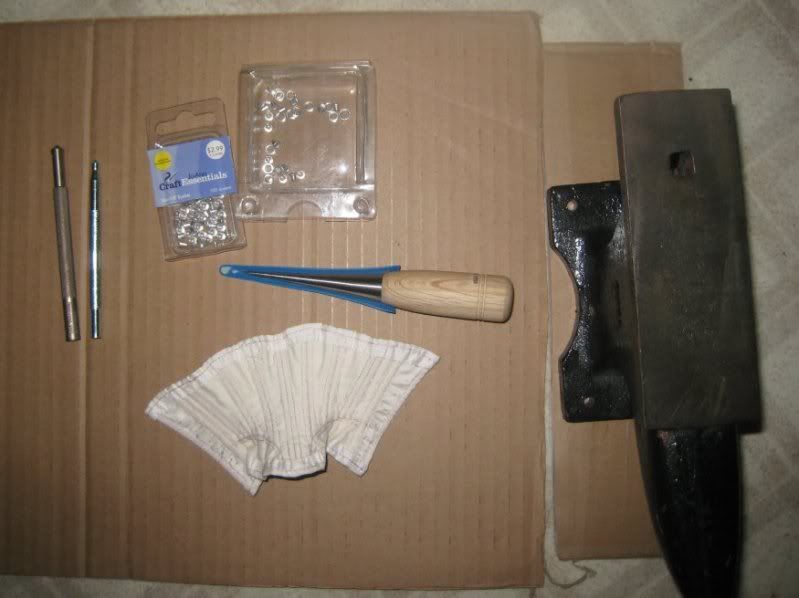
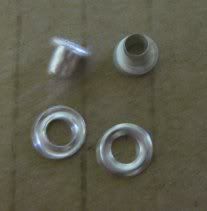
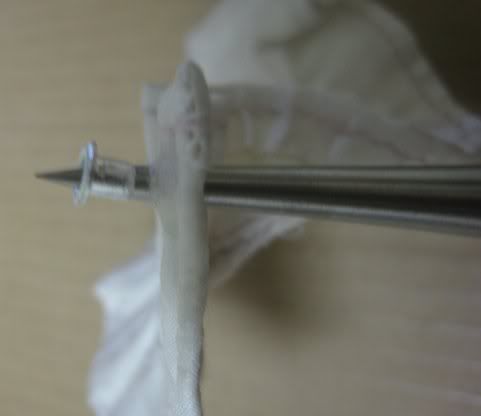
Then I put in mini eyelets with washers that you get at scrapbook stores.
There are several brands of Mini Eyelets to choose from. Making Memories is a commonly available one.

7 mini eyelets with washers! on each side. don't ask me where I got the washers, it was a scrapbook store in Washington state, many years ago and the label has been long lost. These washers are domed just like real grommets. I have saved them and prized them. I used mini eyelets from Joanns though as they have a longer shank than the ones from Making Memories. If you can't find min eyelets with washers, take your mini eyelets to the hardware store, I find that size 5 metric have the right internal diameter for the mini eyelets, but are larger external diameter, so they look funny on the wrong side.


The tools of the trade

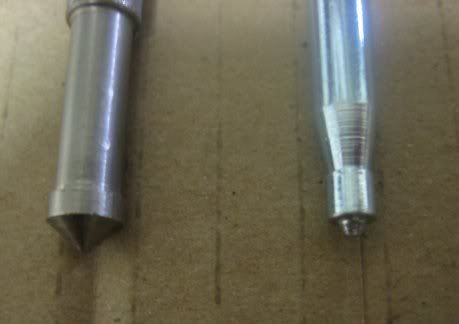
Setting tools, The one on the right was the one that I used. I think it is an older style from Making Memories?

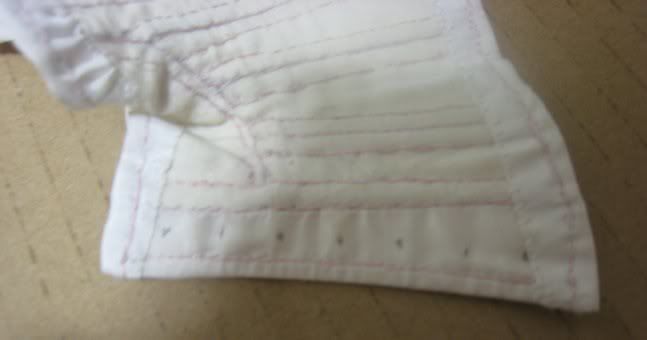
Marking the spacing for the eyelets.


The eyelets and washers (bad photo, night time)
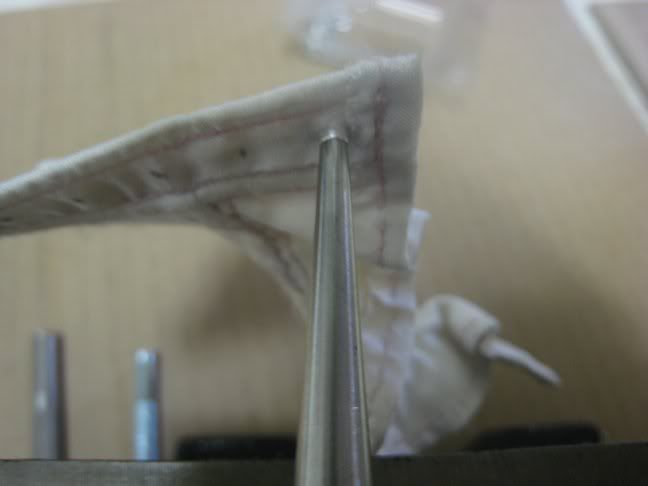
Making the hole with my lovely Awl. I have several awls, including an icepick but this is the one that feels best in the hand.


I used the string from a flour bag to lace up the corset.


The Chemise, Drawers and Corset were finished in the first 5 days I was sewing

Tuesday, December 11, 2012

SPP 2009 Patterning the Corset

I love making doll corsets, properly boned doll corsets that is. I have a big pet peeve of unboned doll "corsets" fashion dolls have been around for centuries, and when they got corsets, they got miniature versions of the real deal. there are even Victorian doll corsets complete with scaled down opening busks!


Lot 722 Three Doll Corsets commercially made doll size corsets. Largest 7" H. Via Live Auctioneers, sold by Dan Morphy Auctions LLC in October 2008.

Now while I had attempted to make a doll sized corset busk before, I was not feeling up to it this time, In period the size of doll corset I would be making was most often found buskless.

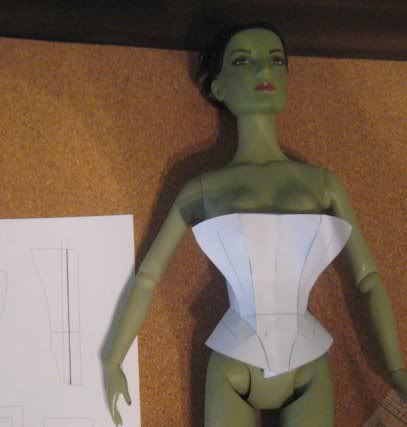
I had already found my pattern,  Us Patent 79647 by Lavinia Foy in 1868, I chose it because it didn't have gussets, and was not a straight seamed corset with vertical panels only. It was interesting, I have found that when dealing with a hard bodied doll, the seam placement has a lot to do with giving the right period corset look, since you can not change the actual shape of the body.

Source: google.com via Corsetra on Pinterest


Old patents Rock for finding corset patterns, but check to see if they include seam allowance before you use them! I took a screen capture of the PDF, and put that picture as a background in CAD, traced the pattern lines and adjusted them so that they actually matched up.
 You see my red lines are a bit different, but they all match up. (yay CAD for being able to measure lines!)
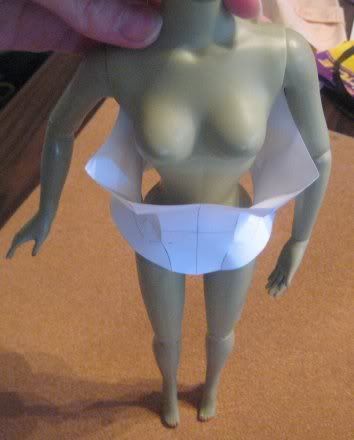
Using the measurements that I took off Elphaba, I scaled the pattern so that it was the proper front length, and printed it out!

The corset was the proper length but it was too big around! 
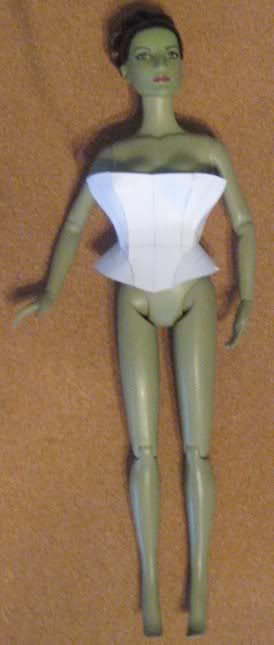
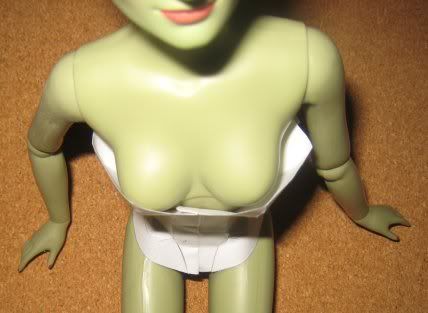
 The first thing I did was bring in the front. you want that first seam to be either right on or just inside the apex of the bust.
Elphie's apex to apex is 1 1/8" the pattern is about 2" so I took off 1/4" from each side of the front, it is still a bit to the outside, but I couldn't take any more off or I wouldn't have enough room to put in a bone.
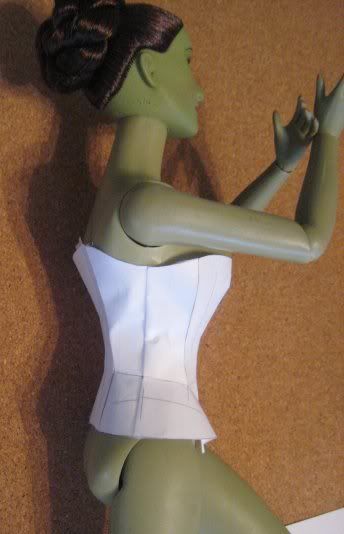
Next I fitted the back
I folded over 3/8" off the center back
 Because I need room for the back boning, I decided to alter the back hip piece, swinging the seam straight down from the waist. this is a really simple switch.
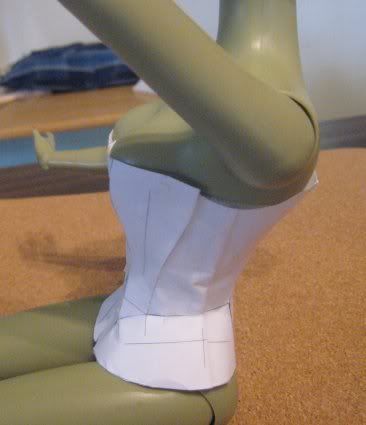
Now it was time to fit the side piece. I wrapped the corset around the waist and made a not of how much it overlapped, this would be the amount I needed to take off the sides.
I taped the back shut and to the doll at the proper waist height, and turned my attention to fitting the side pieces.
I pinched the side at the convenient grain marking I had made and took out the excess. I took it straight down through the hip piece.
Now the waist was perfectly fitted. I decided to leave the hips a bit "free" as I found she needed this extra when I sat her down.
But the bust was still a bit too big.

This is partly due to the fact that Elphaba is made of plastic and her boobs do not have side spill. I just folded the excess to the side, and it was all good.
I then took my paper pattern back to the computer and made the changes to my CAD file.
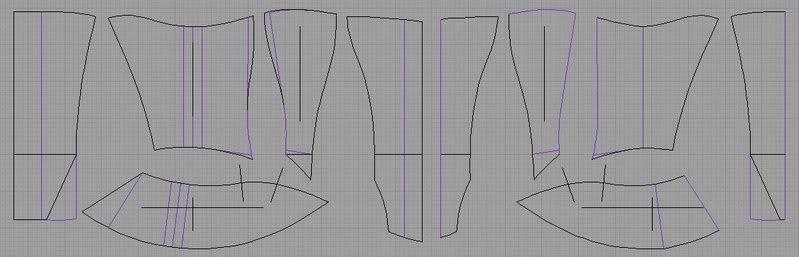
 On the left is the original pattern with the changes marked in purple, on the right is the finished pattern all ready for printing. Notice the waist balance marks?

 Boy this post was longer than I remembered! I think I will put the actual sewing into another post.

Another method for making a doll pattern is to make a duct tape double using saran wrap and masking tape, then draw the seams on the tape.